I mentioned in a post a few weeks ago that I was very pleased to have had 2 images selected for the RPS Annual Members Exhibition, which is currently on in Bristol. Myself and 2 guests were invited to the private view a week ago and although a little nervous, I traipsed along with my daughter and one of my granddaughters. Nervous because although I exhibited work along with peers on a degree course we all took part in a few years ago but I have never exhibited work on a national stage before and I wasn’t sure how my images would stand up against all the other, much more accomplished photographers there.
Well I needn’t have worried, my 2 cyanotypes certainly held their own. There was only one other cyanotype on display and I would say that mine was far superior, not that I am biased at all! I really liked the way they were curated. printed at A3 with white borders in simple black frames and alongside other works of complementary colours.
I am glad of one thing and that is that I had submitted my work for this exhibition before the camera club competition mentioned in my previous post. If it had been the other way around and I had listened to the ramblings of the camera club judge, I would never have submitted them.
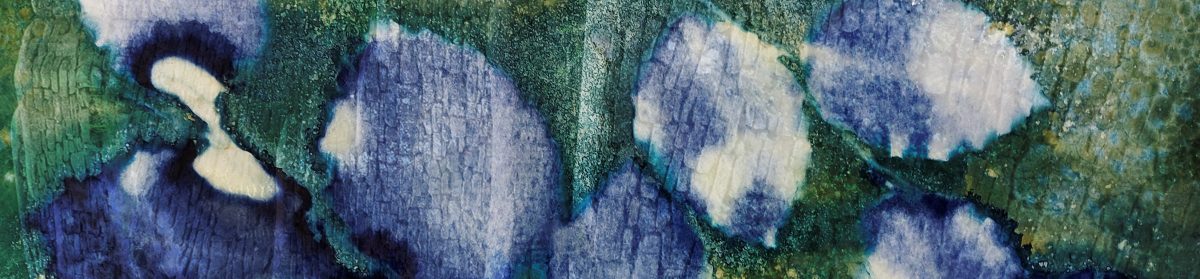
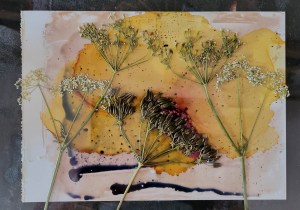
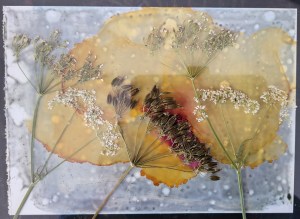
Hydrangea Seedhead and Allium seedhead wet cyanotypes with added vinegar, turmeric and soap bubbles on display at the RPS Summer Exhibition in Bristol from 1st July to 28th August 2023.
Yet another experiment resulted in a disappointing outcome, although there was a hint of possibility in my last but one experiment because I seem to have a better consistency of cyanotype chemicals and gelatine. There is still a problem coating the paper, partly I think because the cyanotype emulsion is diluted too far with the gelatine so is too weak but also, its still does not adhere well to the shiny surface. As a result I doubled up the exposure time and still felt it could have done with longer.
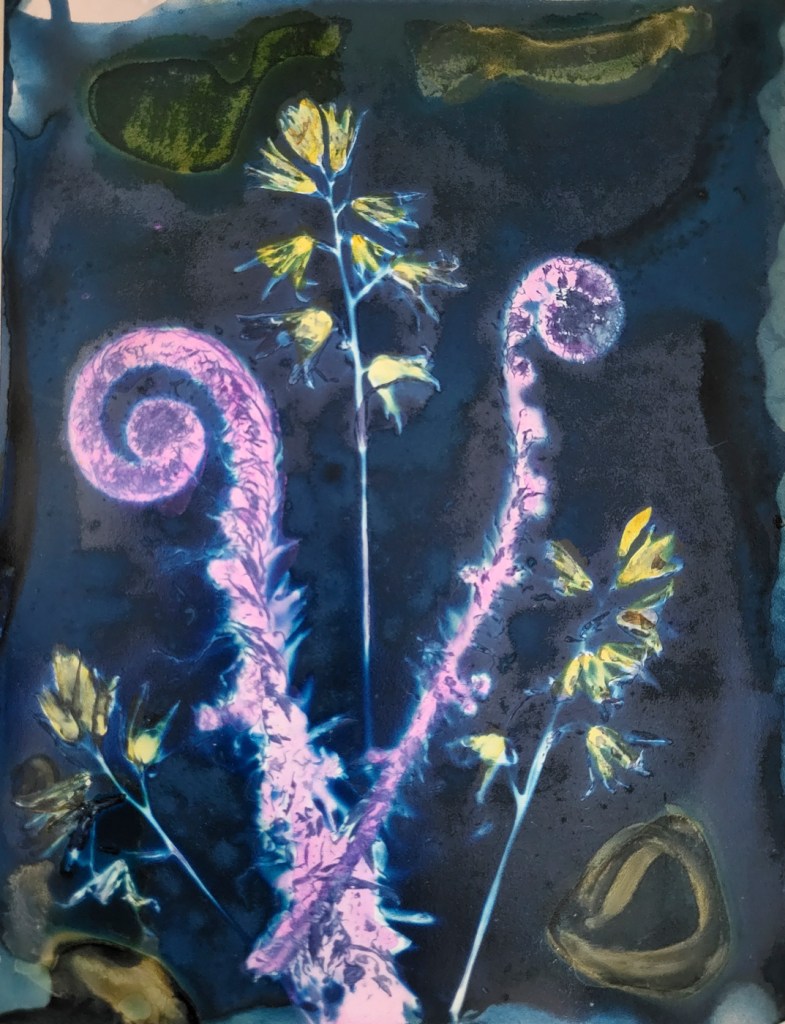
But, after following my bullet points from the last post, leaving the print overnight before washing, soaking for 5 minutes in iced water, then washing, I have a print with some evidence of cyanotype as well as ink.
It is a pretty rubbish image but the purpose was to experiment getting the emulsion to stick to the shiny paper without using more resources rather than creating a work of art, so I will persevere and see what materialises.
I have however had a little bit of a breakthrough in that someone on the Facebook Cyanotype page posted some images she created using cyanotype and alcohol ink. Her process is different but I think very successful.
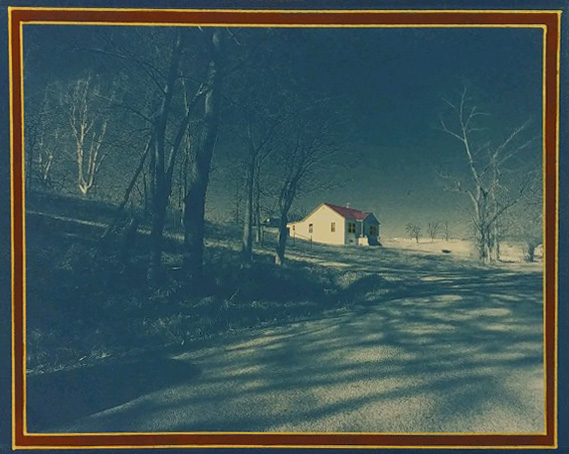
Cyanotype tinted with alcohol ink by Leigh Wallace
Leigh mixes her own chemicals, exposes, adds vinegar to the rinse then hand tints with alcohol ink diluted with a little water. The gold border is also added this way. I think this is stunning and would certainly hang it on my wall!
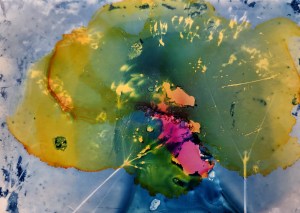
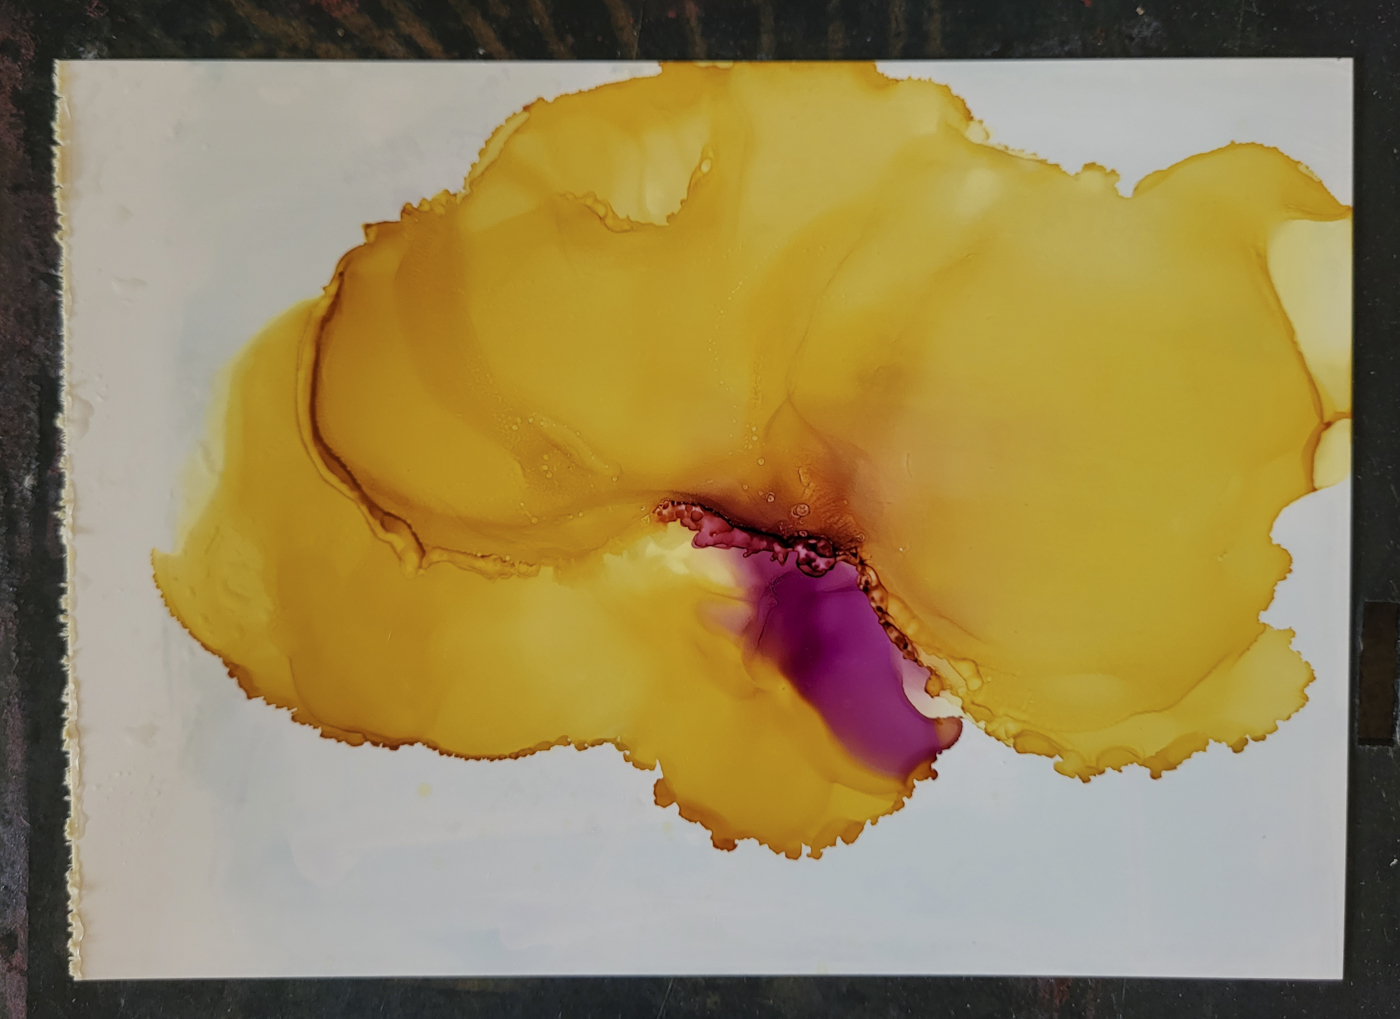
As I am still very much in the experimental stage and as previously mentioned, keen not to use too many expensive resources in the process, I have gone back to an existing print to try this out. My first question was why dilute in water rather than more alcohol, so I have tried both. This is a cyanolumen from a couple of weeks ago on the left and the tinted version on the right.
In the tinted version, the pink, or ‘plum purple’ as it says on the bottle, is diluted in water, whereas the yellow is diluted in isopropyl alcohol. I actually found the ink diluted with alcohol easier to work with. It dries more quickly and it seems to have a more translucent quality. I also painted some of the yellow on the blobs and quite liked the effect that gave. There are so many variables though and each impacts differently on the outcome.
For example, this print was made on expired dark room paper, Kentmare Bromide Stipple, and that may have an impact, so next experiment with be on the watercolour paper I usually use for cyanotypes. For the first time in a couple of weeks though, I am starting to see a glimmer of light at the end of the tunnel.
Over the last week or so I have continued to experiment with alcohol ink and cyanotype mixed with gelatine. I’ve not yet learned what I can do but I have learned quite a lot about what doesn’t work!
I found another of Jo Howell’s blogs in which she talks about working with cyanotype on glass and thought this principle might work on the Yupo paper I have been using. In this blog, Jo discusses how she dilutes the gelatine and how much cyanotype chemical she adds, so that was my starting point. Jo said she followed the guidance for dissolving the gelatine but used less water than the suggested pint, so that it fitted into her lightproof bottle – not sure how big that was though! I diluted my gelatine up to about 1/2 pint, added the cyanotype chemicals, 25 ml of each, then the solution was allowed to cool overnight by which time it had turned into a fairly loose jelly.
My first mistake was to use this to coat the paper but when I re-read Jo’s blog, she warmed the solution up slightly so that it was in liquid form.
As you can see, the paper isn’t very well covered and once exposed, you can clearly see areas not coated at all.
I did have hope of another happy accident but that was not to be because when I washed the paper, all of the cyanotype washed off, leaving the paper as it was before any cyanotype had been applied. When I went back to Jo’s blog again, she talked about soaking the exposed paper in very cold water to set the cyanotype before washing whereas I had just ran it under the tap.
So, the next stage will be:
Warm cyanotype/gelatine mix before coating
Make sure paper is super clean – Jo makes the point that if it isn’t the solution will pool around the dust.
Expose – not sure for how long. the last print was exposed for 10 minutes so I will try 20 next time.
Maybe leave overnight to harden? I will try one with and one without
Soak in ice cold water for 5 minutes to set gelatine