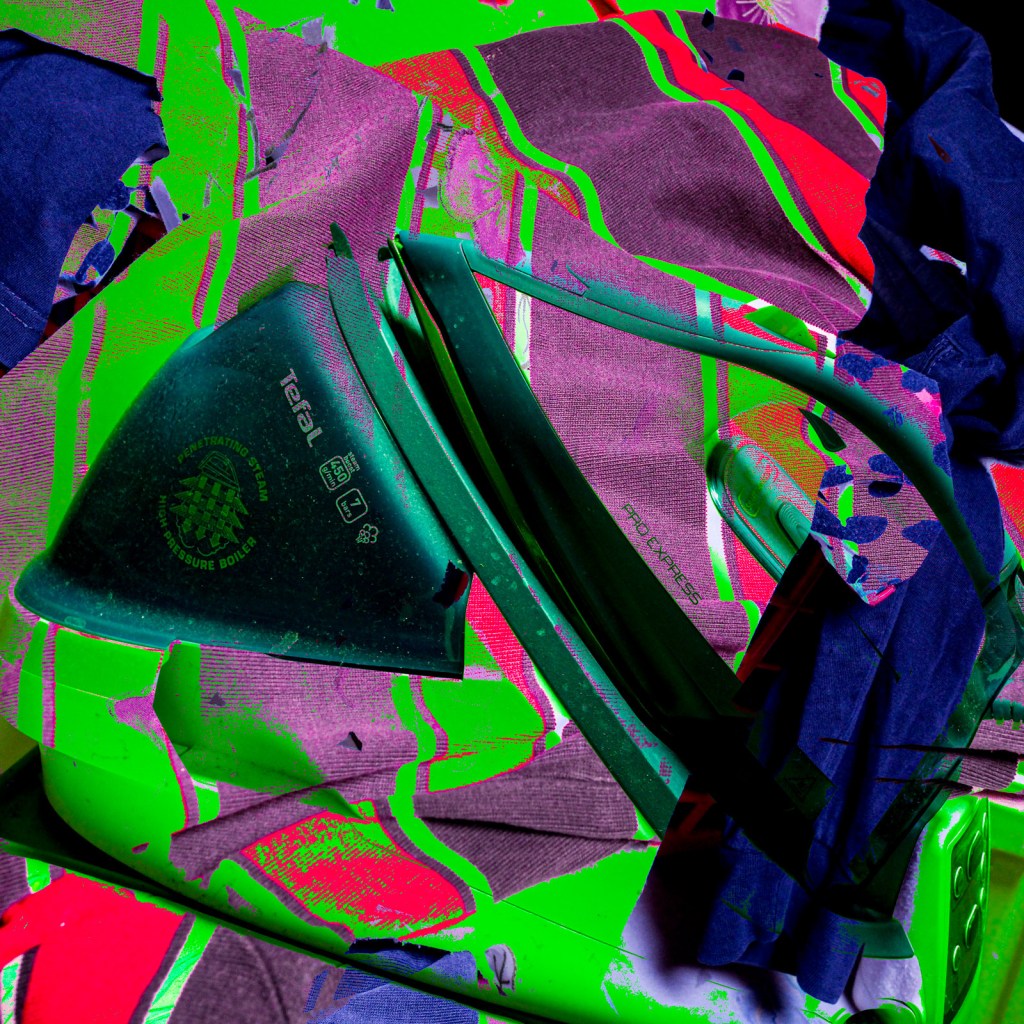
Another obscure hint, does it mean make something you can use for domestic purposes or the focus of your work should be something domestic? I have gone for the latter, the ironing.
I mentioned in an earlier post about an upcoming workshop on multiple exposure. Well on Thursday we had a short Zoom session with the tutor prior to the workshop, to make sure we could get out cameras set up in advance. This includes exploring multiple exposure settings but also creating different custom white balance settings. The idea being that we will learn to create weird and wonderful abstract images. Having really no idea what I was doing, but excited by the prospect, I decided to have a go with the ironing pile.
Maybe I should just wait and learn to do it properly 🤣🤣. Day 14 done though, I am now half way through.
This is nothing new for me as I always have several things on the go at the sometime. I currently have a 52 week sewing challenge which I plan to post about. I have also started a 6 week Photoshop Zoom session on Friday evenings and I have a ‘multiple exposure’ workshop coming up this weekend. And that is besides, the usual home duties and school governor role. So, this was literally 10 minutes snatched whilst making the dinner. This hint also fitted nicely with yesterday’s about changing your practice so I have combined the two.
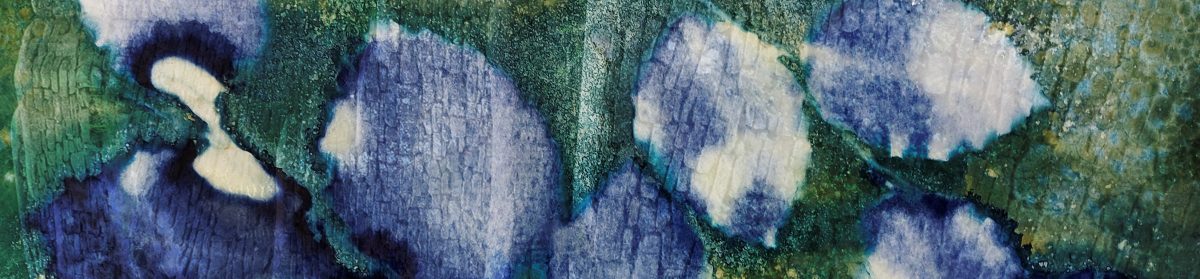
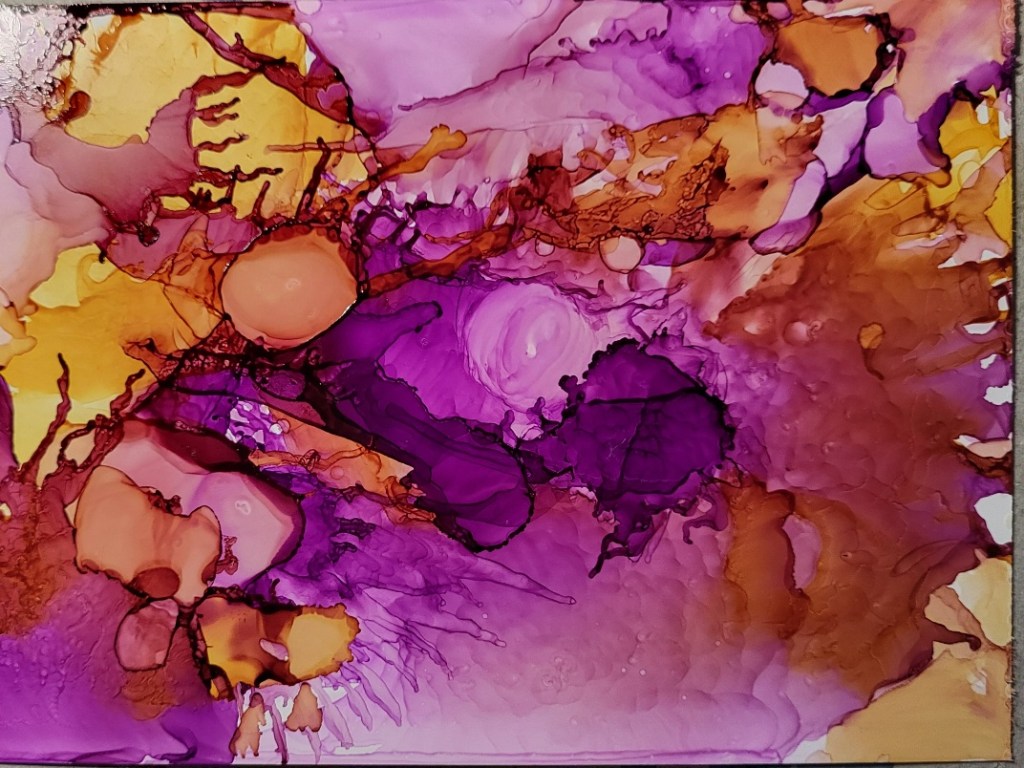
It is a while since I played around with alcohol inks and a hairdryer and like some of the other alternative processes I have tried, the results are very hit and miss, at least they are for me. My new hairdryer is obviously quite a lot stronger than the one I used previously as I didn’t feel I had much control but it was something completely different and ws literally done in the ‘in-between times’.
Like a lot of these processes, and I guess that may be the point of this challenge, it has made me think about getting the inks out again and sitting down and having another go.
Today’s hint, which I can ignore, is ‘Force a change in your practice’. I can only think that the @artquestlondon robots are reading my Instagram posts and noted my wittering on about test strips yesterday! It probably is time for a change, but how do I force it or has it already been forced upon me? However, having spent days working on test strips, changing the curves on negatives and doing more test strips, I finally have something I’m almost happy with so the change will take place tomorrow.
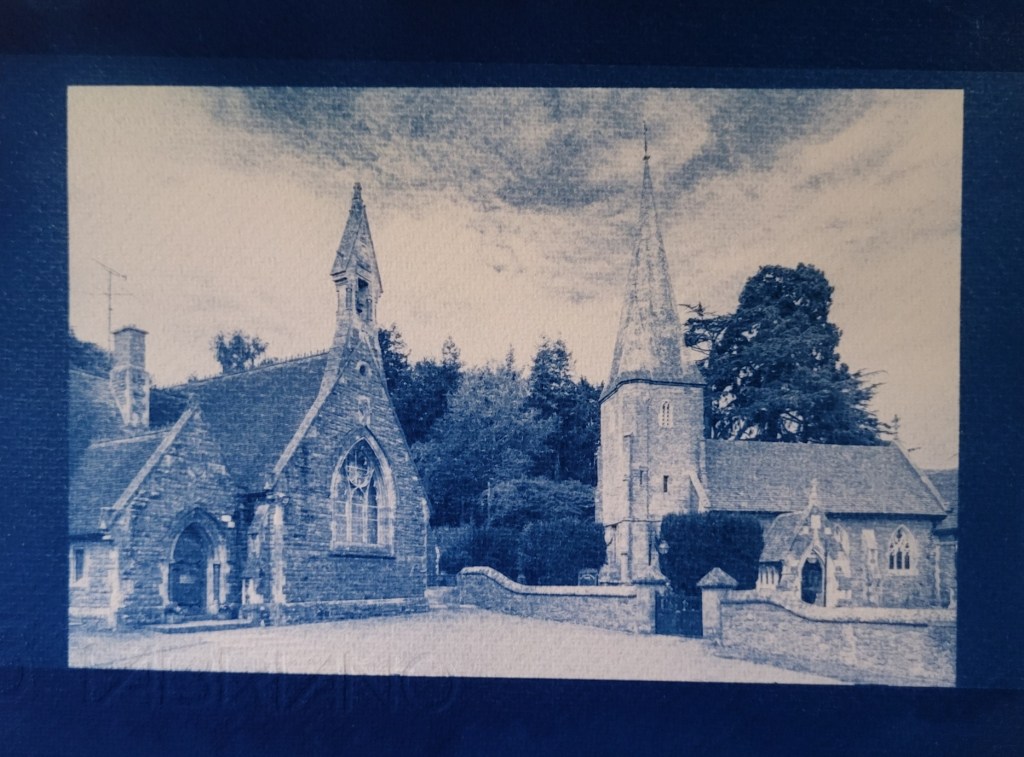
Thus was made from the last sheet of Fabriano 50% cotton that I sensitised for the test strips I made yesterday as I’m very aware that the slightest change in any of the variables will result in a change in the final print. It was exposed at 4 1/2 minutes using my Everbeam 100 watt UV lamp. The Church spire is still not quite right but I was relatively happy with it until I spotted a major problem.
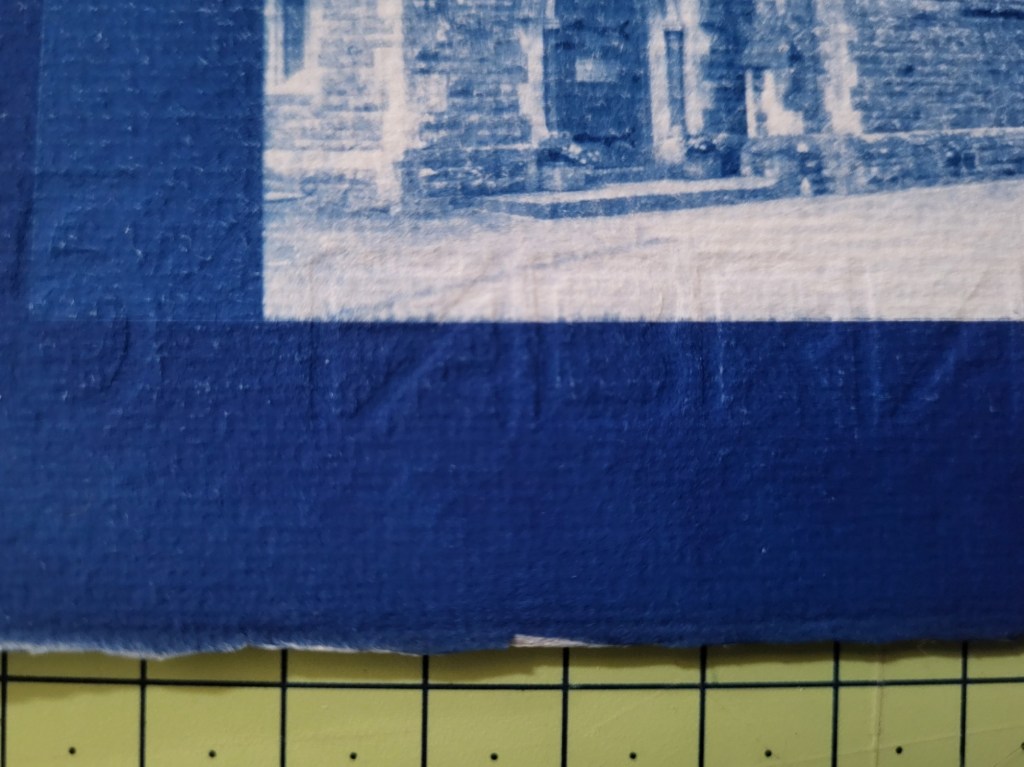
I hadn’t cut the watermark off the bottom of the paper before exposing the print. How frustrating!!! Sometimes it really is time for a change, but for now, this is my day 12 submission.
Playing catch up again. I start off with great intentions but time seems to slip away. I’m still in the challenge and have been posting to Instagram daily as soon as I have uploaded my image. Maybe that is when I should add my post here but I always have more to say here and so it goes on.
I am finding these hints more challenging as time goes on. How do you interpret ‘last ever work’. If I took that literally I wouldn’t make any more work at all and I don’t think that is the intention. One person appeared just to scrawl ‘last ever work’ on a board and I don’t think that’s the intention either. I chose a slightly more challenging route which was to decide that this would be my last ever attempt to get some cyanotype test strips right for the work I had planned for the next day and I would go with whatever the outcome was.
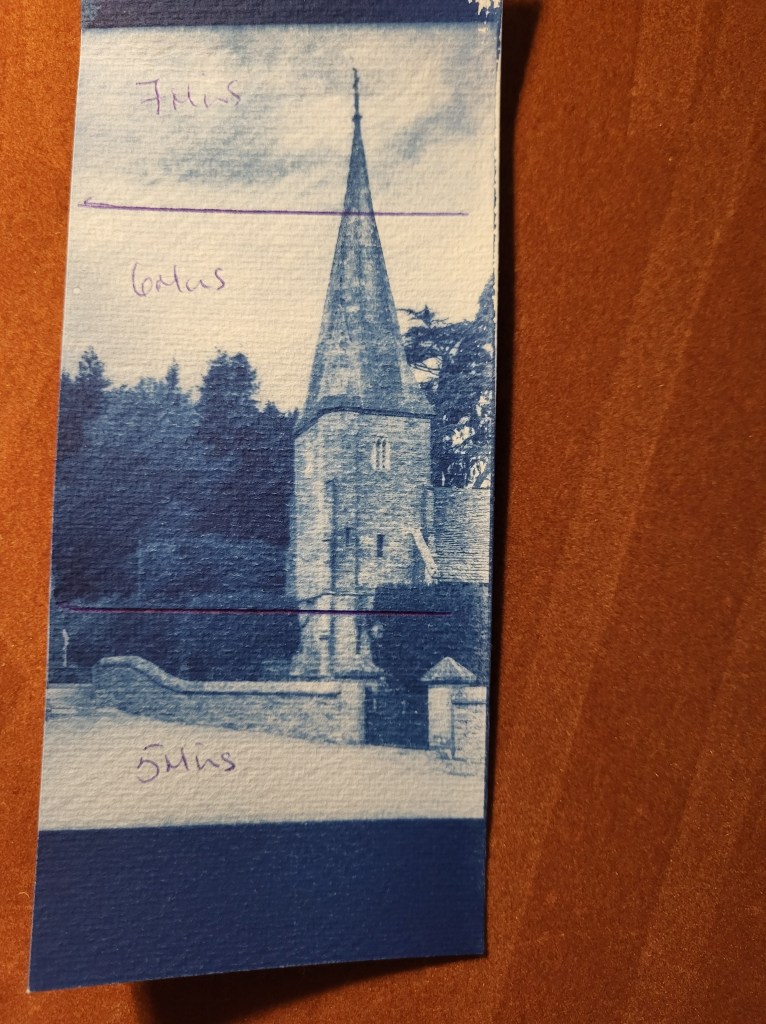
Initially I had been using a ‘Bockingford 90lb’ paper. It is quite lightweight and warped when sensitised. Also, it didn’t seem as absorbent as some of the other papers I have used. I’m not sure what I bought it for, maybe book making but it doesn’t really work for cyanotype so, back to one of my favourites, Fabriano 50% cotton that I got from the sale shelf in Jacksons Art. Whilst I’ve made plenty of cyanotype prints, very few have been made using digital negatives and this is a whole new ball game as I’m finding out. I hadn’t really appreciates why you were advised to use a fairly low contrast photo until I found all of the highlights blown whilst the dark areas were over exposed. A custom curve for cyanotype in Photoshop is also advised and luckily there is one in Christina Z Anderson’s book on the subject, albeit for an Epson printer but a good starting point nonetheless. So this is where I am so far. Three more test strips, all sensitised with the same solution at the same time.
The first test was exposed at 5, 6 and 7 minutes. However, the church building is built from lighter stone than the school, so I did the same again with a larger section of the negative.
This suggested 5 minutes so the final test was done at 4, 5 and 6 minutes
I know this was supposed to be a challenge but I wasn’t prepared for it to drive me bonkers!
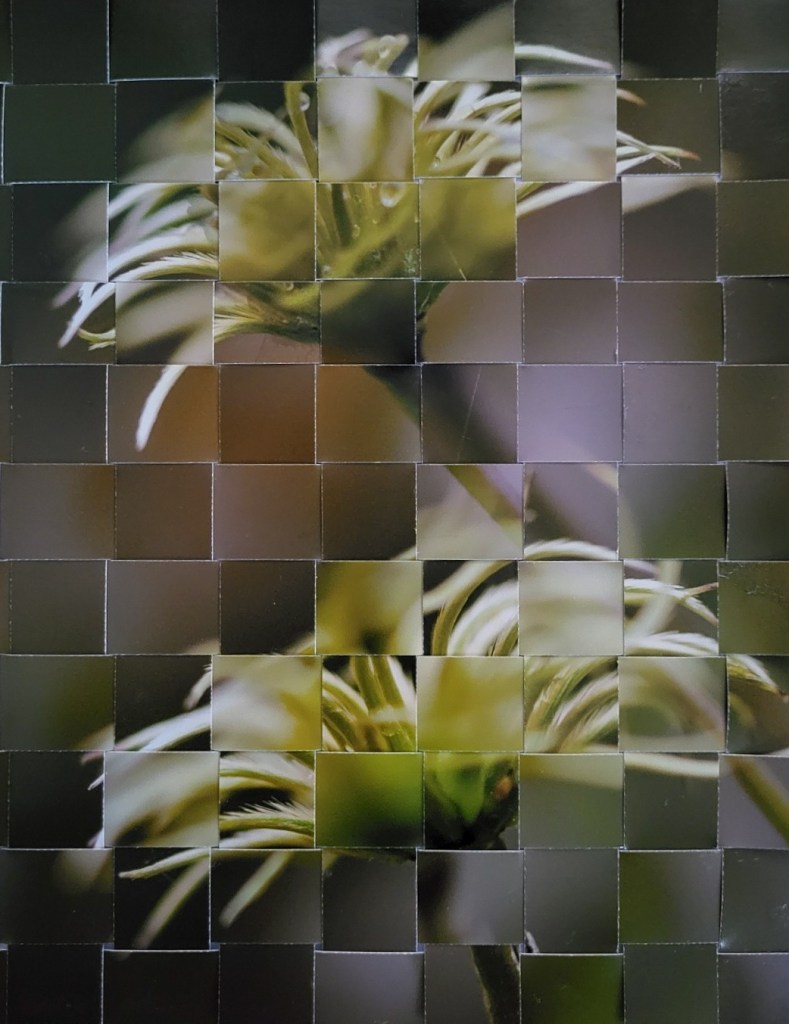
Another hint I thought I would struggle with until I started routing though a pile of old prints and came across 2 prints of clematis seedheads I had made for a talk on differential focusing a couple of years ago. Seedheads, what better for birds at this time of year, but what to do with them. I have quite enjoyed weaving photographs and cyanotypes and thought this might work here. The two photographs had originally been taken at the same time with the camera on a tripod and only the focusing being changes which meant they were exactly the same size. I do find getting each of the strips aligned quite difficult, even though I had numbered them as I sliced the prints up. And, as I look closely towards the bottom of the bottom flower, there does seem to be something amiss, but hay, its all part of the learning process.
I interpreted this hint as who inspired me and started to think about some of the strong women in my life. To start with my maternal grandmother, born in 1892, the second youngest of 5. She was a huge influence on my life and I’m sure none of my siblings would dispute that I was her favourite. As the oldest of 7, she made sure I had special times. I would stay by myself with her and grandad for holidays when she would take me out on old peoples trips with her. One of our favourite outings was to the York Cafe in Falkirk where we would have a ‘fish tea’ in the upstairs restaurant and for those who don’t know, a fish tea consisted of fish and chips, bread and butter and a cup of tea.
She taught me to knit and crochet, which considering she was left handed and I right, wasn’t easy. I would embroider with her and she would turn my work over to look at the back and ‘tut, tut, tut’, it was supposed to be as neat on the back as it was on the front. She lived into her 90s, walking down to the town every day to get her ‘messages’ and always popping in next door to see if ‘old Miss Cockburn’ needed anything as granny reminded me that she was ‘over 70 you know’.
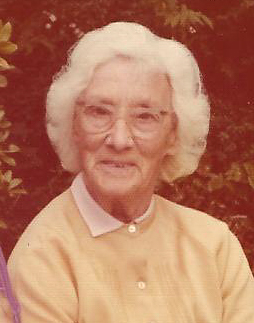
I was the oldest of 7 with 3 sisters and 3 brothers. Father was always in work but didn’t earn much so mum, who had trained as a tailoress when she left school, took in sewing. Mum made all of our clothes and it was not unusual for there to a wedding dress or curtains lying on top of her old treadle sewing machine which now resides in my dining room. I learned a lot from my mum, not least how to make a little go a long way and NEVER, throw food away! This is mum on her 21st birthday
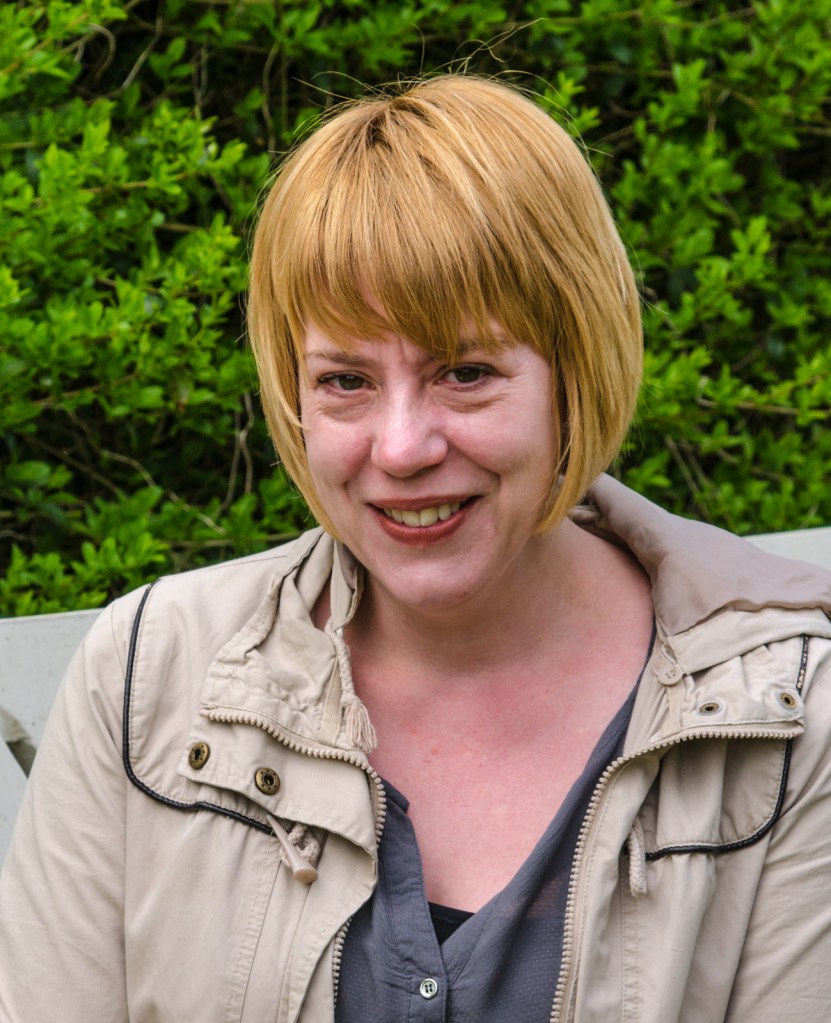
My daughter is a strong woman too, it must be in our genes. and I have to admit that I have learned a lot from my daughter too. She works hard but still makes time for her mum and I enjoy nothing more than a girly lunch with Justine.
And then there is me, a mix of all of them, or at least, I am what I am because of them. I should at this point add that I am no expert in amalgamating images in Photoshop, although currently working though an online Photoshop workshop, so hope to be able to improve on this when I have done.
I have kept up with my art projects over the last week, now 10 days in for the Artquest 30/30 challenge and 5 weeks in for Bobbin Along. Artquest 30/30 first.
Each day. Artquest give a hint which can be used as inspiration or ignored and to be honest, I don’t always find the hints work that well for photography, at least not what I want to do. However, whether it is maybe my brain is becoming attuned or just more open minded, for the last couple of days. I have found something I thought worked.
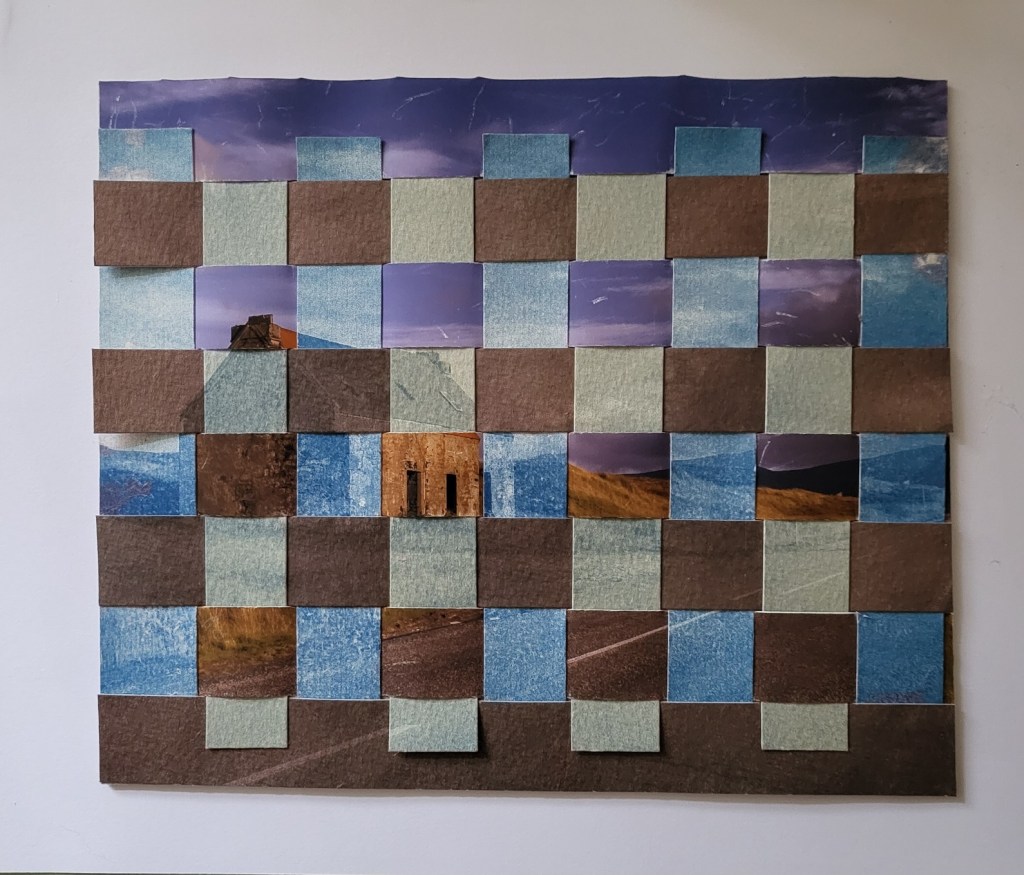
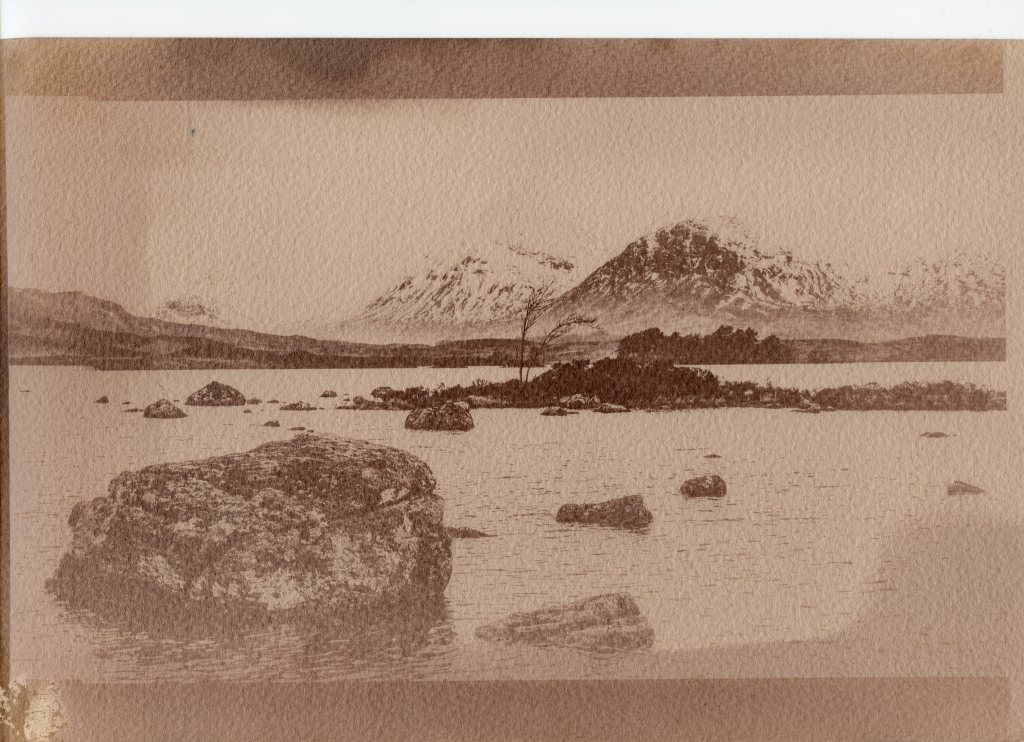
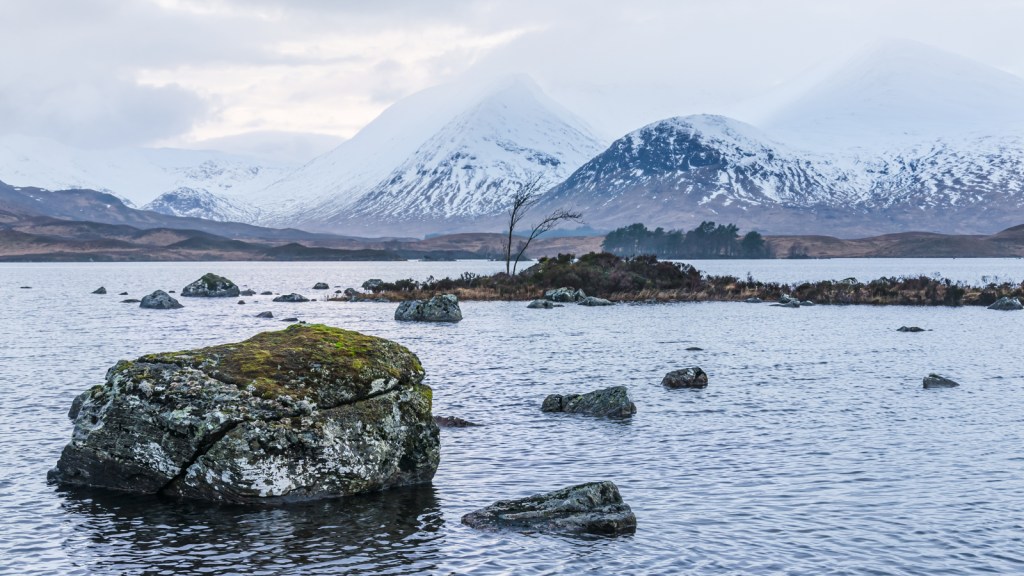
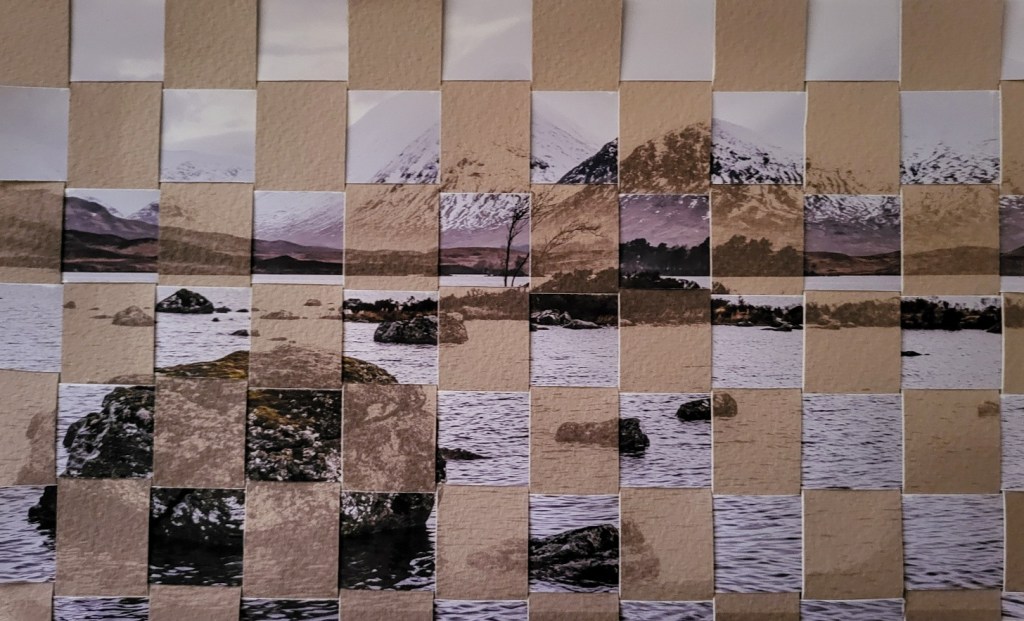
For day 7 of the 30/30 challenge, the hint was a day in your life. for this I chose a photo I took a couple of years ago in Wester Ross, the one I had used for cyanotype test strips a couple of days previously. I wasn’t terribly happy with the resulting cyanotypes. Two were over exposed and the other ok ish. I bleached the over overexposed images and toned 1 of them, then wove them together with the original photograph and entitles the resulting image ‘4 Seasons in a Day’ which you frequently get in Wester Ross.
I’m not sure that weaving the cyanotypes with the original image was entirely successful and can only think this is at least in part due to shrinkage when cyanotypes are continually washed.
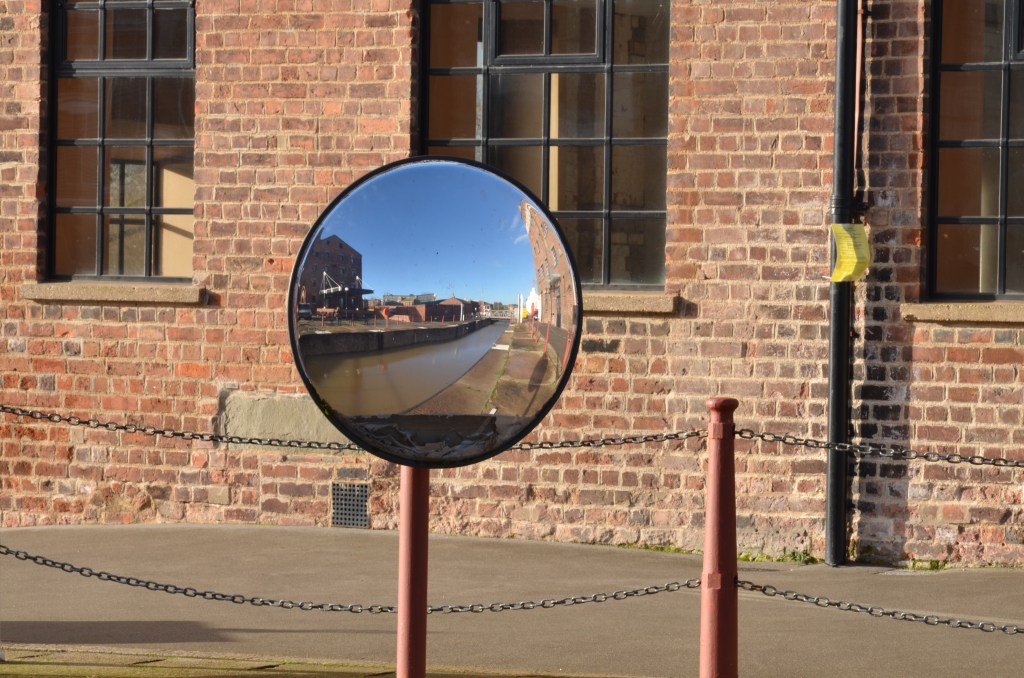
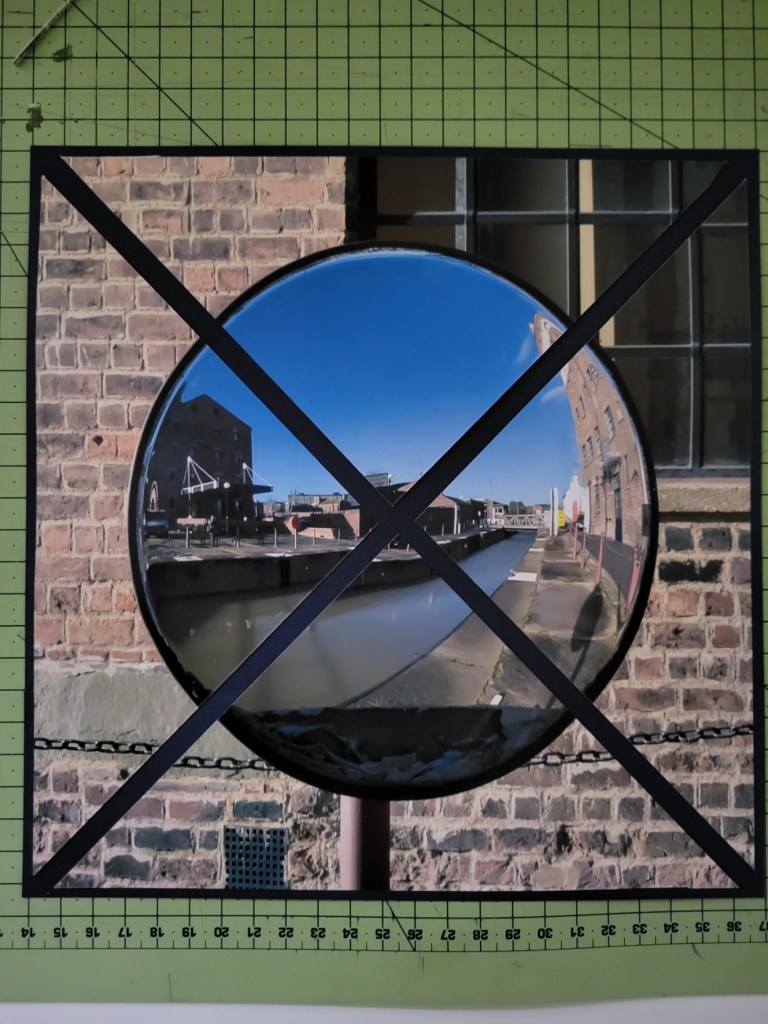
Day 8 hint was easier and again I delved into my archive of photographs. The hint was ‘Triangle, cross, circle, square’ and for this I chose a photo that I had taken a few years ago for a camera club competition.
I cut the photo into a square with the circular missor in the centre, then cut from corner to corner making 4 triangles and places some dark card underneath to make a cross. I wish they were all that simple!
I thought after yesterday’s test strips I was just about there as it seemed to me that 9 minutes was about right on the paper I had tested. Not so however as when I printed the actual image at 9 minutes it was very over exposed., I did another at 6 minutes with the same result. As I said in my last post, this lamp is more powerful than my old one, I hadn’t realised just how much.
I had two sheets of precoated cyanotypes left from a pack I had purchased last year to make cyanotypes with the year 6 children in our local school and thought I would try exposing those at 3 minutes to see what happened.
I’m not quite sure what had happened with the digital negative of the scabious flower, maybe it wasn’t inverted, but I got a better result then I’d had at 6 minutes so it did the job.
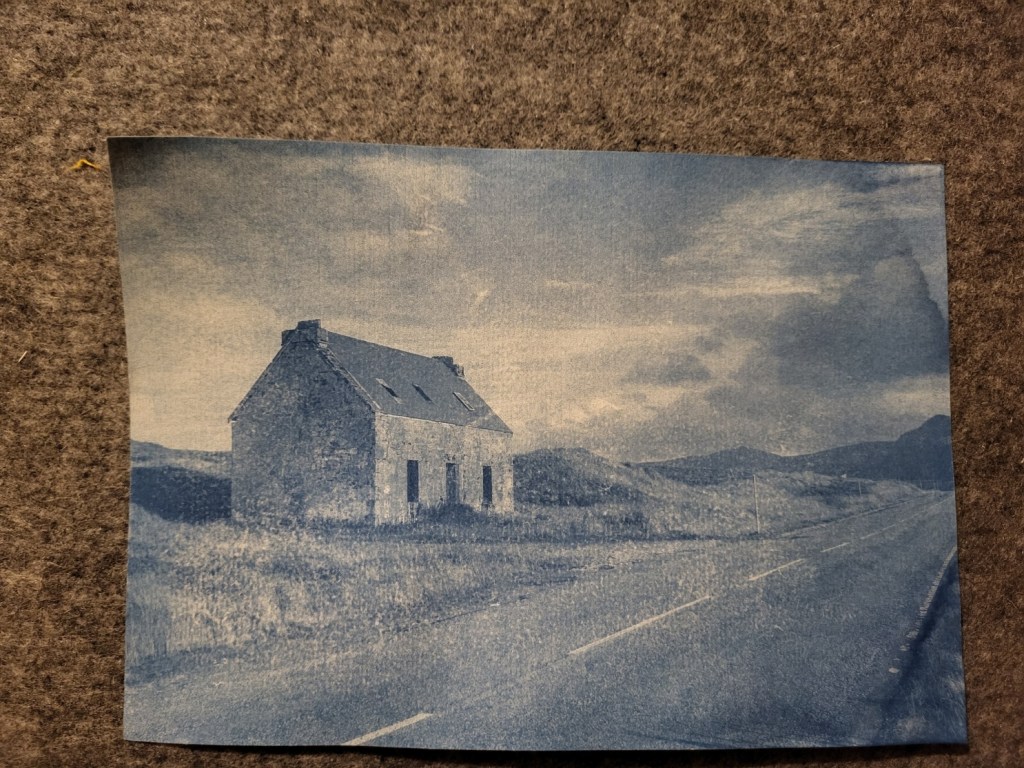
I then used the second sheet of paper to print the old crofthouse I had intended to make in the first place.
This was cheap paper which was already partly exposed at one end so while this print is not the quality I would be happy with, it does give me a starting point for tomorrow’s experiments which I will make on decent watercolour paper.
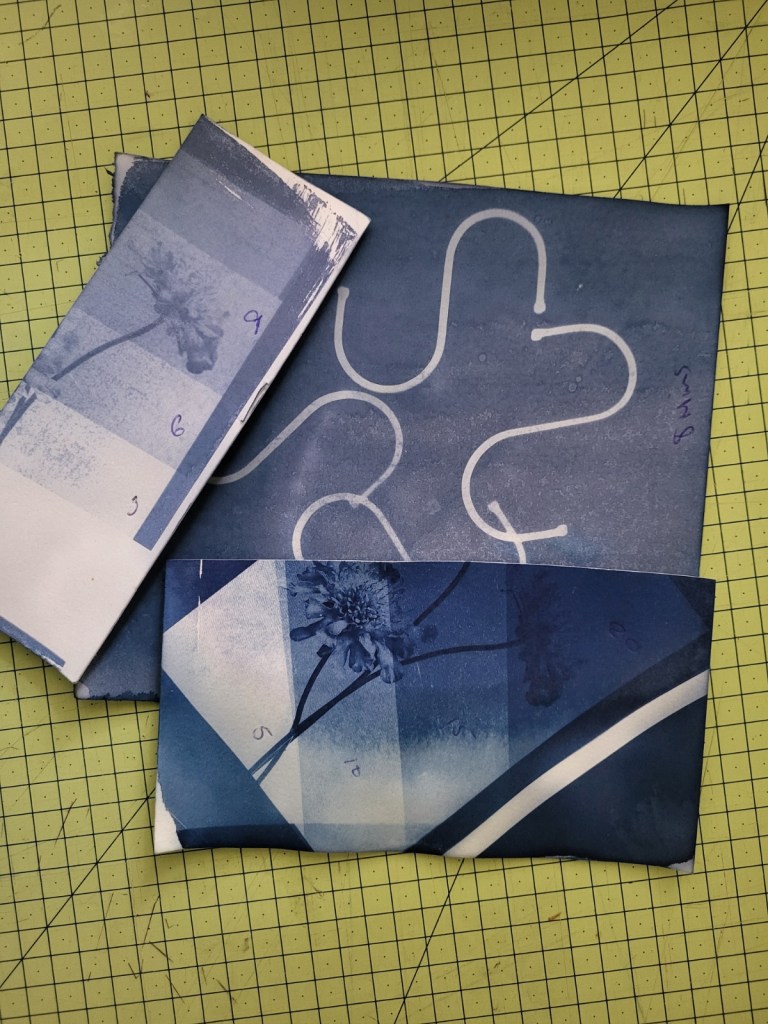
All is not entirely lost with the over exposed prints either though. I have bleached both and toned one with green tea. They are currently drying and tomorrow I intend to weave them along with the one above and see what results. More a question of reuse, recycle and reclaim again rather than following today’s hint with was ‘Try cheating today’.
Some months ago, about 18 to be precise, I bought a new Ultraviolet lamp for my cyanotypes and gum bichromate prints and I have done nothing with it since. The main reason being that for printing, it needs to be hung with the light facing downwards onto the material to be printed and I needed to get a bracket of some sort to hang it onto. It recently dawned on me that my tripod has a boom arm allowing you to photograph with the camera facing downwards, and this is perfect for what I need.
The lamp is quite heavy but I have been able to balance it by hanging a sports weight from the tripod end.
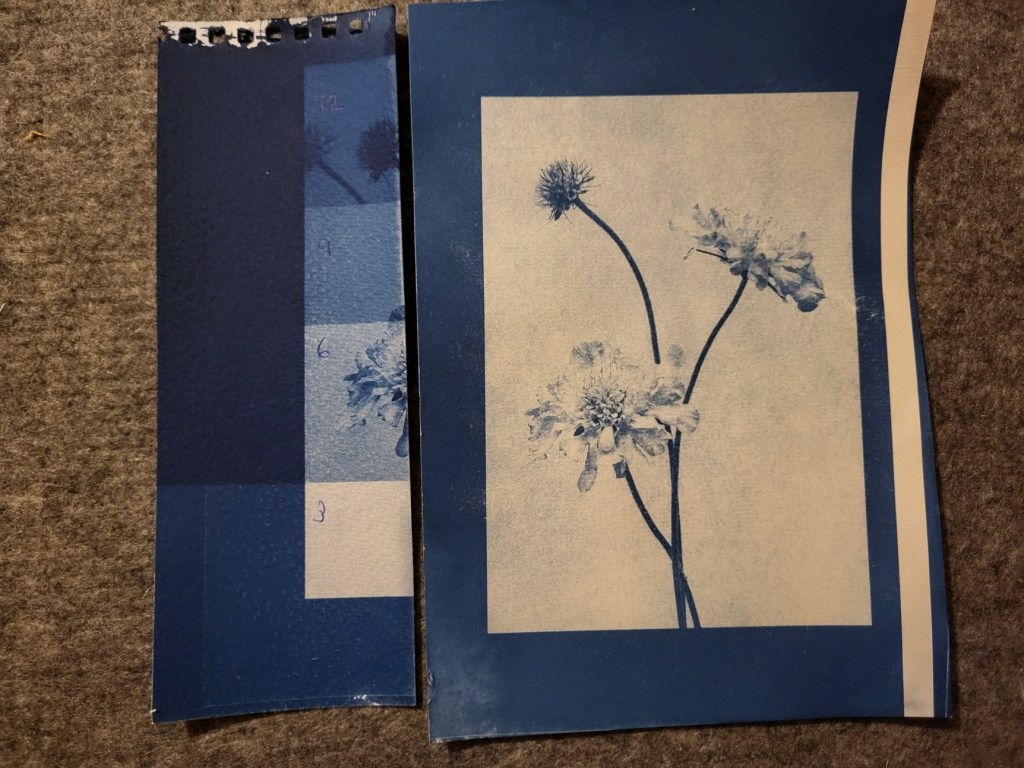
This lamp is more powerful than my old lamp and the distance from the material being printed is different too and varies according to how the tripod is adjusted so I needed to make some test strips before I could move on to the real thing. I used 2 different papers as a starting point and exposed the first one 3 minutes apart, the second 5 minutes apart and based on those results, the final one with the S shaped hooks, for 8 minutes, which looked about right.
All papers are different and require different exposure times, so tomorrow’s job is to do some more test prints using digital negatives, fine tuned with a customised curve for cyanotypes produces in photoshop and hopefully after that, I will be ready to make a proper print.
So today I am back in my box of cyanotypes but this time, made from digital photographs and the plan is to bleach and tone, then weave with the original image that the cyanotype print was made from.
The bleaching and toning process is a little more scientific this time, though to be honest the outcome is still not predictable. My research tells me that one of the best solutions for bleaching is sodium carbonate or washing soda which is readily available in supermarkets, not in the Forest of Dean it seams! However a little hardware store came up trumps. 1 teaspoonful of the soda crystals to 1 litre of water and watch it like a hawk my research also told me. It took no more than 15 minutes to bleach the print. Again my toning agent was green tea. 10 teabags left to brew in 250 ml boiling water for 10 minutes than another 1 1/2 litres cold water added. It can take anything from 2 to 8 hours to get the desired effect, mine took nearly 3 hours to achieve what I wanted.
Weaving with the original image was the second stage of the process and I decided to go with the l cyanotype that I had dyed rather than uploading and reprinting it. This meant though, that I was weaving 2 papers of different weight and textures. As the cyanotype was made on heavier water colour paper, I used that as the base, slicing down from the border at the top, right to the bottom, whilst the original photograph, printed on lighter weight matt photo paper, was sliced into strips horizontally. Although both images had started off exactly the same size, I was worried that the repeated wetting of the cyanotype may have caused it to shrink and there are one or two areas of the final print that aren’t quite aligned, although it could just be that I needed to take more care! It was a god starting point though and as a first attempt, I was reasonably happy..
For the future, I think it would be better to scan in the toned cyanotype and print the 2 images on the same paper, making it easier to align and softer to weave.