Artquest 30/30 Day 3 -Reuse, recycle, reclaim

Artquest 30/30 day 3 and the hint is ‘reuse. recycle’ reclaim’ which was very apt for my focus for this challenge which is, as far as possible to utilise existing material that has lain untouched for months. Having started the challenge bleaching and toning, then weaving old cyanotype prints, today’s plan was to weave 2 failed cyanotypes printed onto fabric, one under and the other over exposed. When making cyanotypes on fabric, it needs to be stretched tight to get an even print and one had been made on a 9″ embroidery hoop resulting in the print being circular, so I used this again as it kept the fabric taught as I wove the 2 together. In both cases, the prints had been made using ferns, so, like those used on day 2, they were similar but different. I think the subject matter is more obvious there than it was in yesterday’s piece. To add a little texture I went back to my textile scrap box and ‘reclaimed’ a few contrasting strips. Does this add interest or just confusion? Outside of my comfort zone certainly but I think I like it.

For day 4, I will be going back to bleaching and toning.

Artquest 30/30 Day 2

My first thought when I saw my toned print this morning was ‘Oh dear’, it was quite a lot darker than I had though last night but it is all part of the learning process. I had planned to weave my prints from yesterday and that is what I would do. I have very little experience of weaving photographs so did a little research. One short video I came across, link below, suggested I cut one photograph in vertical strips but keeping the frame intact and the other into horizontal strips. Preparation usually pays off and I felt this would help keep the piece together as I worked so followed this process.

I numbered the horizontal strips so that they were added in the correct order, having taken a photograph of the intact sheet first which proved to be useful as I needed to refer to it on several occasions. This method worked ok until I got near the bottom of the piece when it became difficult to weave the horizontal strips in. Both cyanotypes were made on fairly heavy watercolour paper and it needed to be softer and more pliable for weaving. In the end I had to open up the bottom of the vertical strips to complete the work. Even pulling each stip up as tightly as I could, I was left with 4 horizontal strips which wouldn’t fit in, again, partly I think due to the weight of the paper. I think next time I will leave the top of both sheets intact so that I have a solid top and left side to work from, also print the cyanotype onto thinner paper.

Thinking about tomorrow, I have 2 cyanotypes, both featuring ferns, printed onto fabric. maybe I’ll see what I can do with them.

https://www.google.com/search?q=weaving+photographs&oq=weaving+photograpsh&gs_lcrp=EgZjaHJvbWUqCQgBEAAYDRiABDIGCAAQRRg5MgkIARAAGA0YgAQyDQgCEAAYhgMYgAQYigUyDQgDEAAYhgMYgAQYigUyDQgEEAAYhgMYgAQYigUyCggFEAAYgAQYogQyCggGEAAYgAQYogTSAQkyMjczN2owajeoAgCwAgA&sourceid=chrome&ie=UTF-8#fpstate=ive&vld=cid:4d199a52,vid:Lm8Y42T10n0,st:0

Artquest 30/30 Day 1 done

Phew, first one under my belt. Very experimental and still slightly damp so I’m not sure what it will look like when completely dry tomorrow and far less when it will be woven with another cyanotype later in the day.

So my first challenge was to bleach and tone a cyanotype print, the intention being that I will weave it with another untoned image tomorrow. with hindsight I should maybe have copied this image before toning so that I could weave a toned and untoned version of the same image but I didn’t do that.

They are the same subject matter and the same size so we’ll see how it works!

The bleaching and toning process was very experimental, there are so many variables you never really know how it will turn out, a bit like making wet cyanotype prints. I used plain chlorine bleach which is quite harsh and can break down the fibres so needs to be used sparingly. After an hour there was no change in the colour of the print so I added a little more and finally after 4 and a half hours I was happy with the result. There was still quite a lot of blue in the image which would result in a darker shade once toned but I was happy with that.

I used green tea to tone the image, 10 teabags left to stew in 250 mls boiling water for 10 minutes and then another litre of cool water added. Research tells me not to use earl grey tea as it contains quite a lot of oil which prevents the paper from absorbing the colour. The tea I used was flavoured with mint and I worried that this might cause a problem too but it doesn’t appear to have been an issue. The print was left face down in the brew for about 30 minutes before I was happy with the results. As can be seen, there is quite a pint tinge to the highlights but I’m happy with that for now. Tomorrow’s job, once the print is completely dry, is to slice each print and weave them together. Exciting stuff!

Kickstarting my creativity

I seem to have been stuck for a long time, dabling in this and that but not going anywhere. Over the past 12 months I’ve been doing a bit of patchwork and quilting, a little ICM and some infrared photography but cant really settle to anything. It was at a quiliting workshop that the tutor mentioned that she was starting a 52 week stitching challenge with Anne Brooks. Each week thoughout the year, Anne gives a new prompt and releases a short video showing how she interprets in in stitching; this year the prompts will all be words. The idea is that you build up the work over a 12 month period. This is way out of my comfort zone as my preferred mode of working is to know, or at least have an idea what I will end up with. But, I have signed up to ‘Bobbin along’. The second kick was an email from Artquest reminding us of their annual challenge, 30 in 30, whereby we have to create and upload a new piece of work evrey day for 30 days starting 1st February, today. I signed up to that too though not really confident that I could do both but as both as small amounts of work, why not?

So, where will I find the time? Well, most mornings I have a second cup of tea after breakfast and sit with my iPad for an hour. What a wasted hour! Surely I can use that hour to better effect somewhere in the day.

How will I approach these challeges? Bobbin along is relatively easy, if uncomfortable. We have one work to respond to each week. The first was layers, the second loops, then rolls, then hummock and this week’s word is wrinkles. Anne shows us via a video how she interprets in and how her work is building and we all follow suit. Some weeks it might take an hour and some maybe just 15 minutes, its up to us. There is a forum and a Facebook page so you can see how others have approached it and you can take inspiration from that or do something completely different. Watch this space!

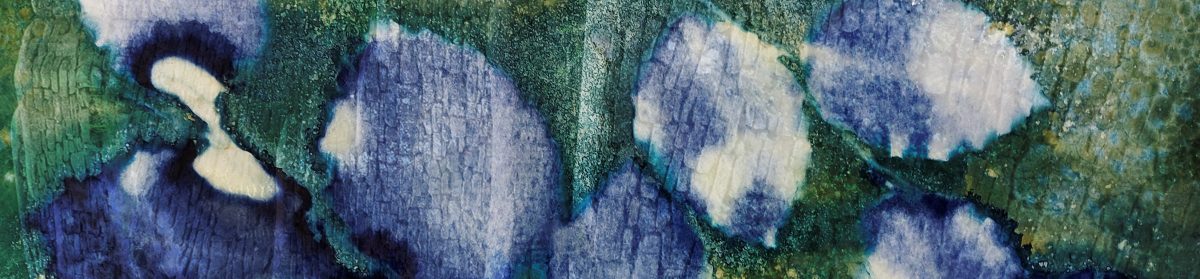
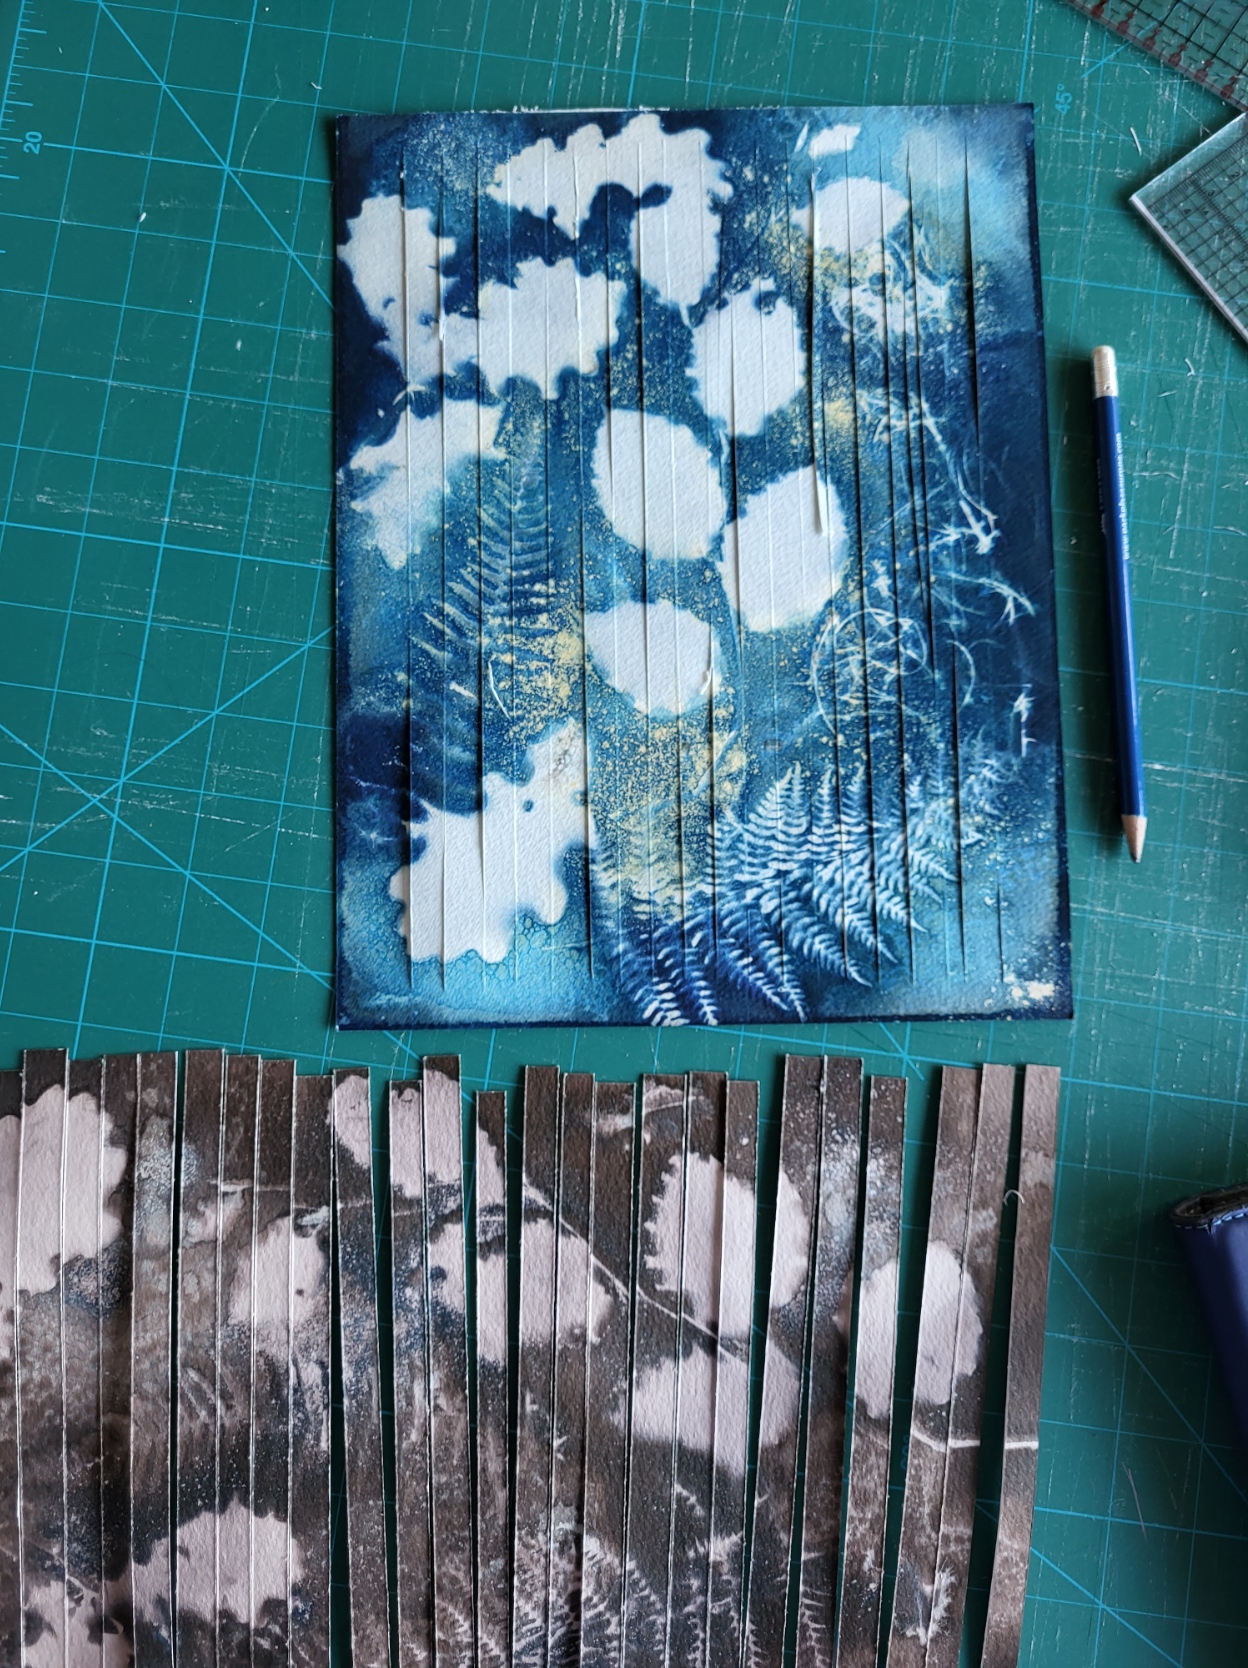
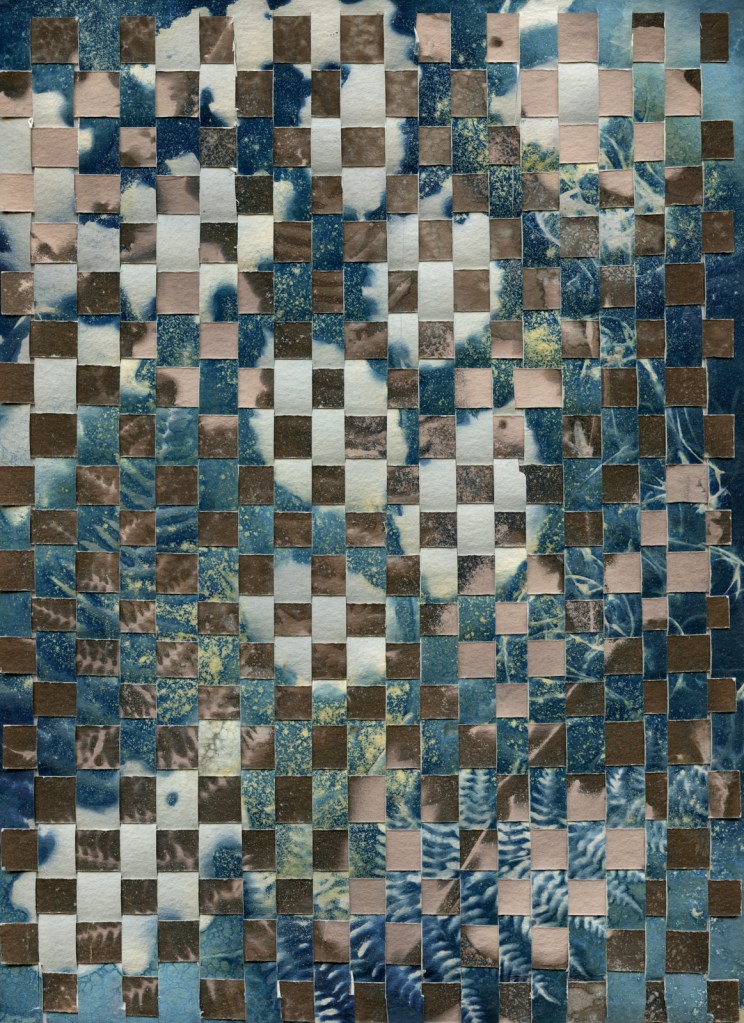
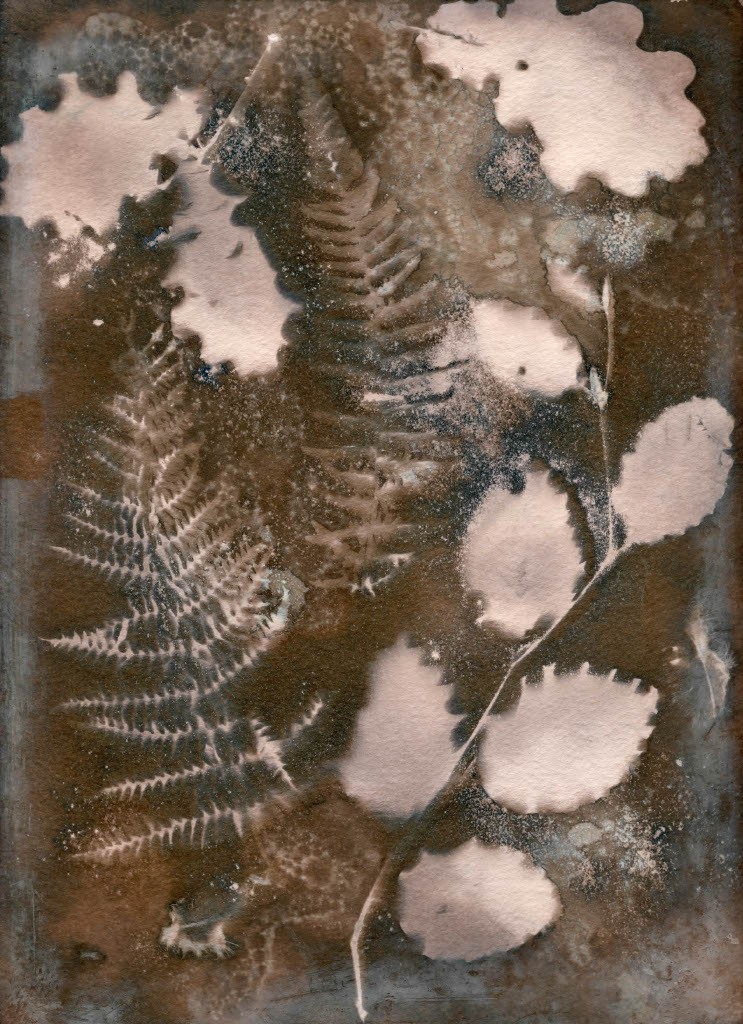
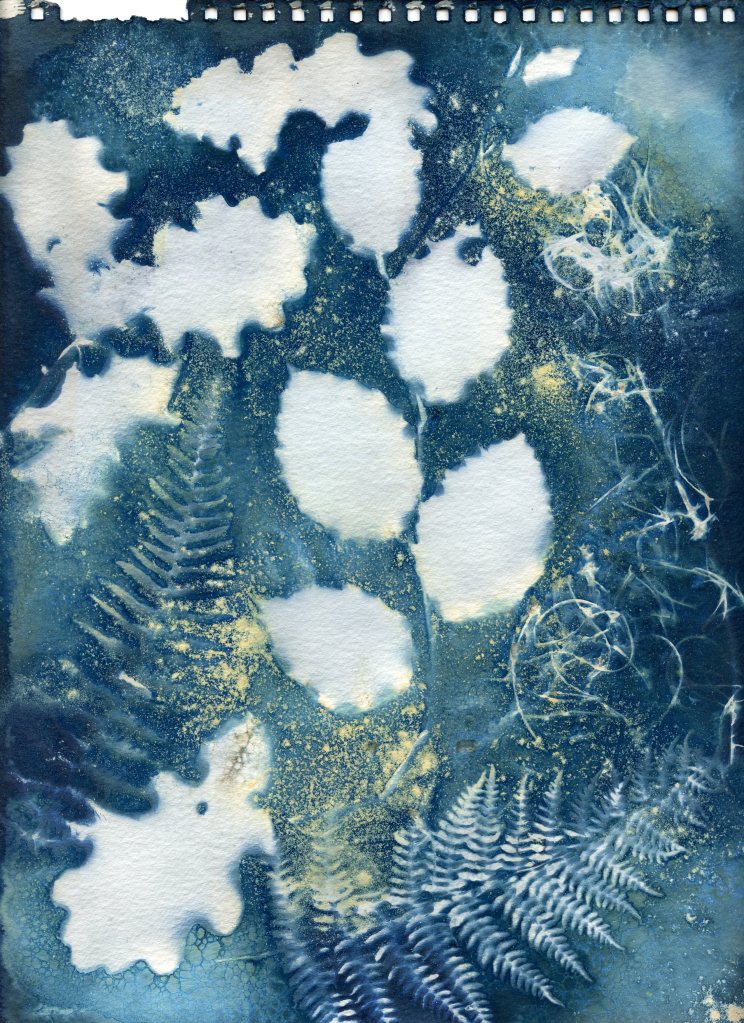
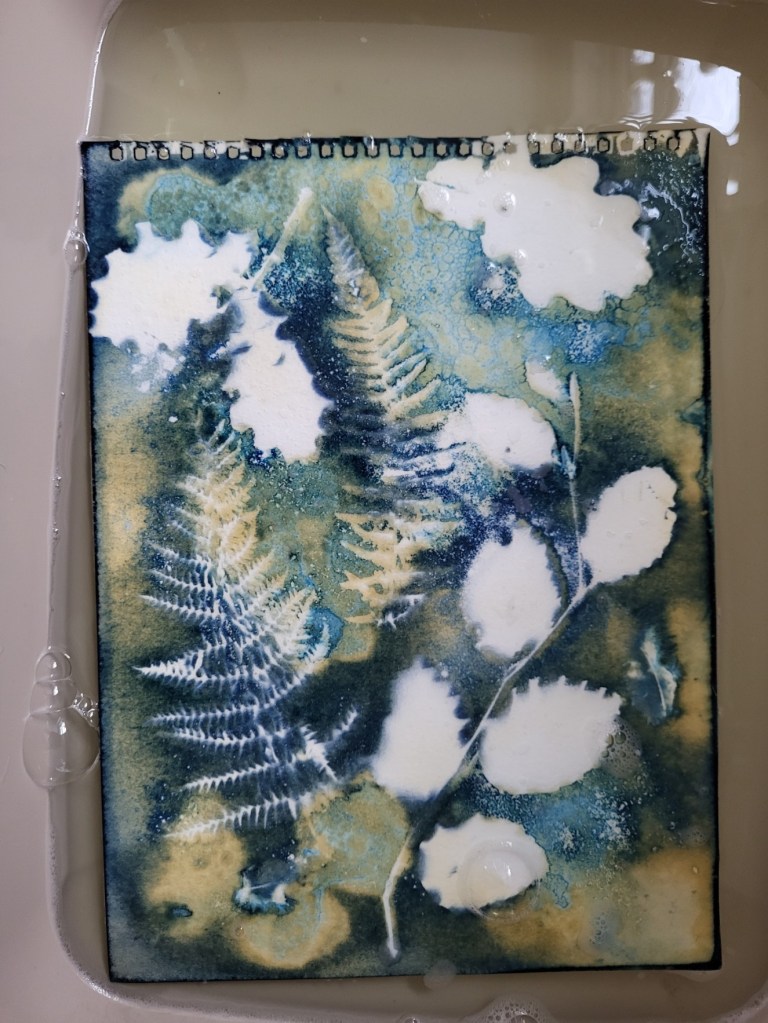
Artspace 30 in 30 is slightly more challenging. For one thing, you must upload a new piece of art each day and if you miss a day you are out. I’m not a great decision maker so where do I start? I’m not confident enough with the stitching malakry to opt for that as I will probably spend more time unpicking than anything else so it has to be photography related. I’m probably not going to be able to go out and take new photos every day but I do have an archive of images I’ve done nothing with including lots of infrared photographs I haven’t processed and a pile of cyanotypes that have sat in a corner of my study for months, some years and that’s where I’m going to start. Much of this will be experimental though, it may work or it may not but isn’t that what art is all about?