Blog

Introduction to Infrared

A few weeks ago I attended a workshop at the Photographic Academy at the Imaging Warehouse in Stratford on Avon, on Infrared Photography. I’d been toying with this for a while and was inspired by a couple of people I follow on twitter, so when I found this workshop an hour from home, I thought I’d give it a go. The workshop was run by Simon Weir, https://www.simonweir.com/, whose main specialism is producing and photographing classical music performances but his infrared photography is stunning. There were 6 of us, all mail apart from me and all complete novices when it comes to IR. I had previously run an infra red film through an old Canon A1 with an R72 filter but but was such hard work trying to compose and focus, then add the filter and try to figure out how much to adjust the exposure by, it ended up being quite an expensive experiment.

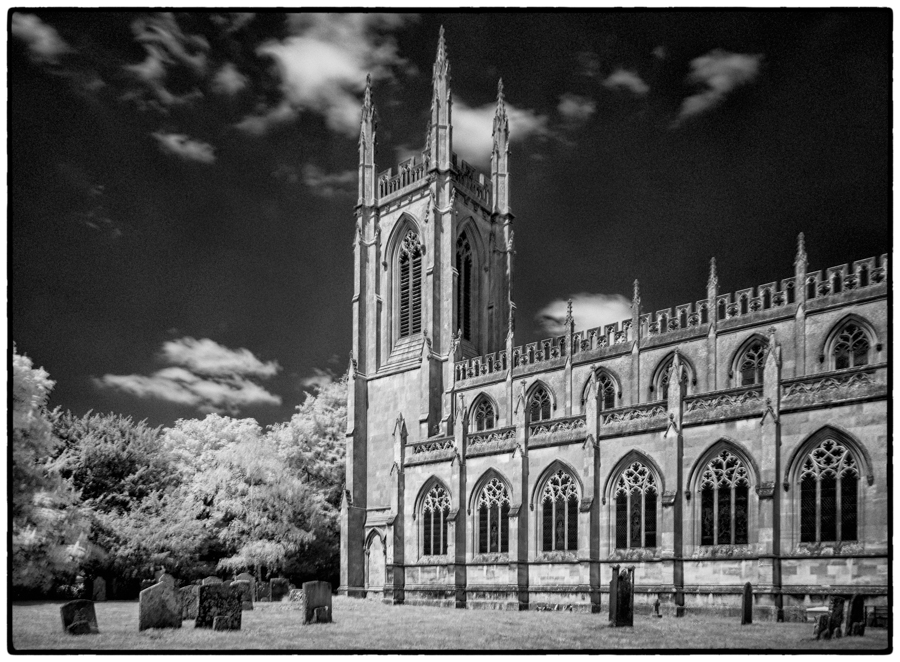
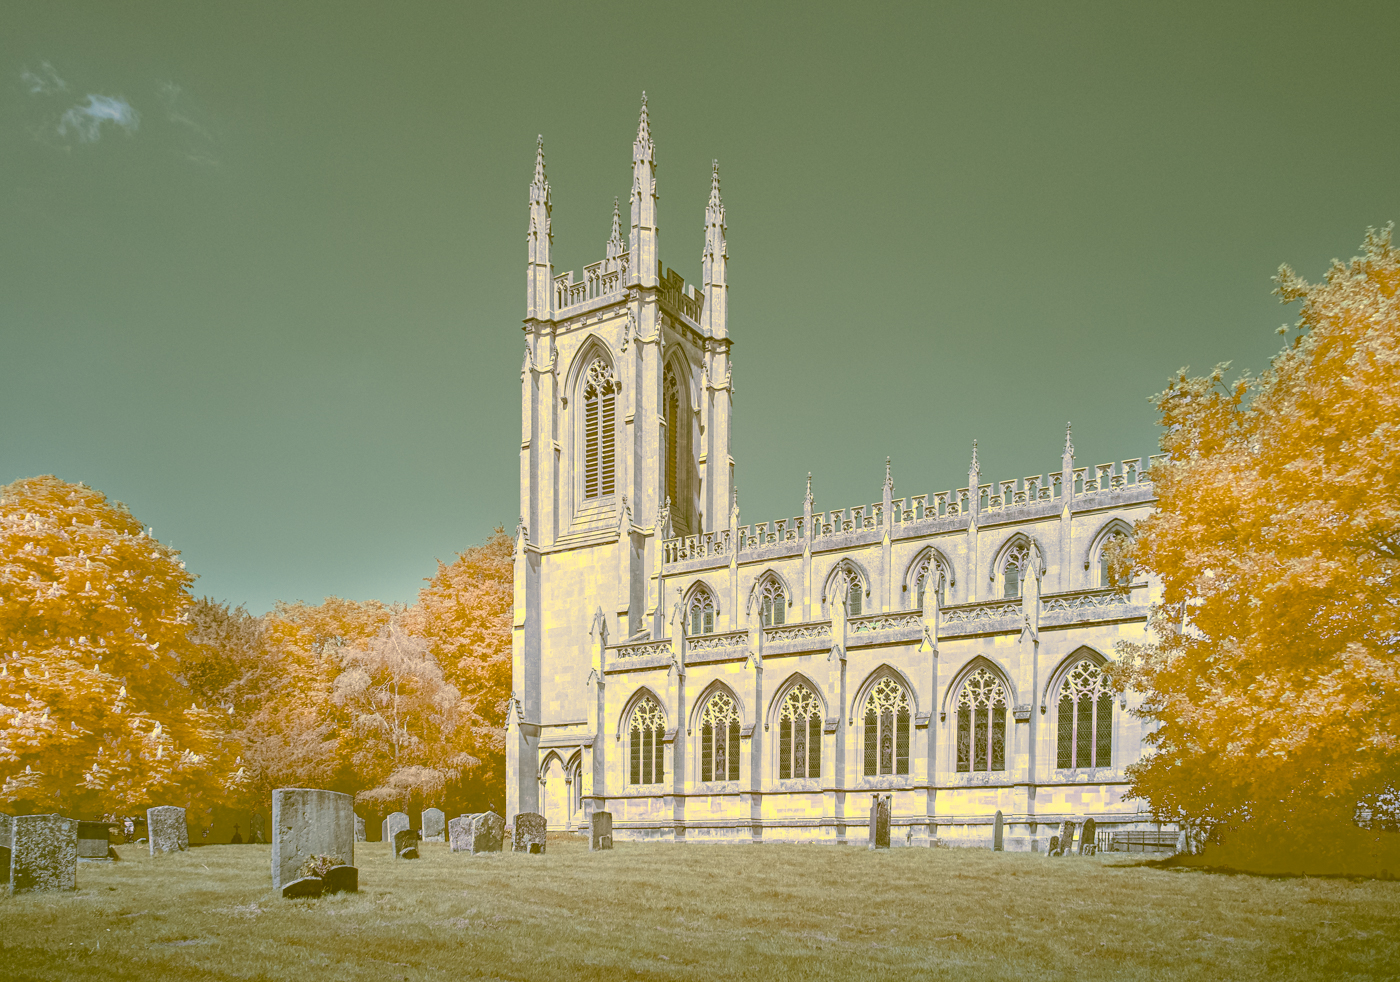
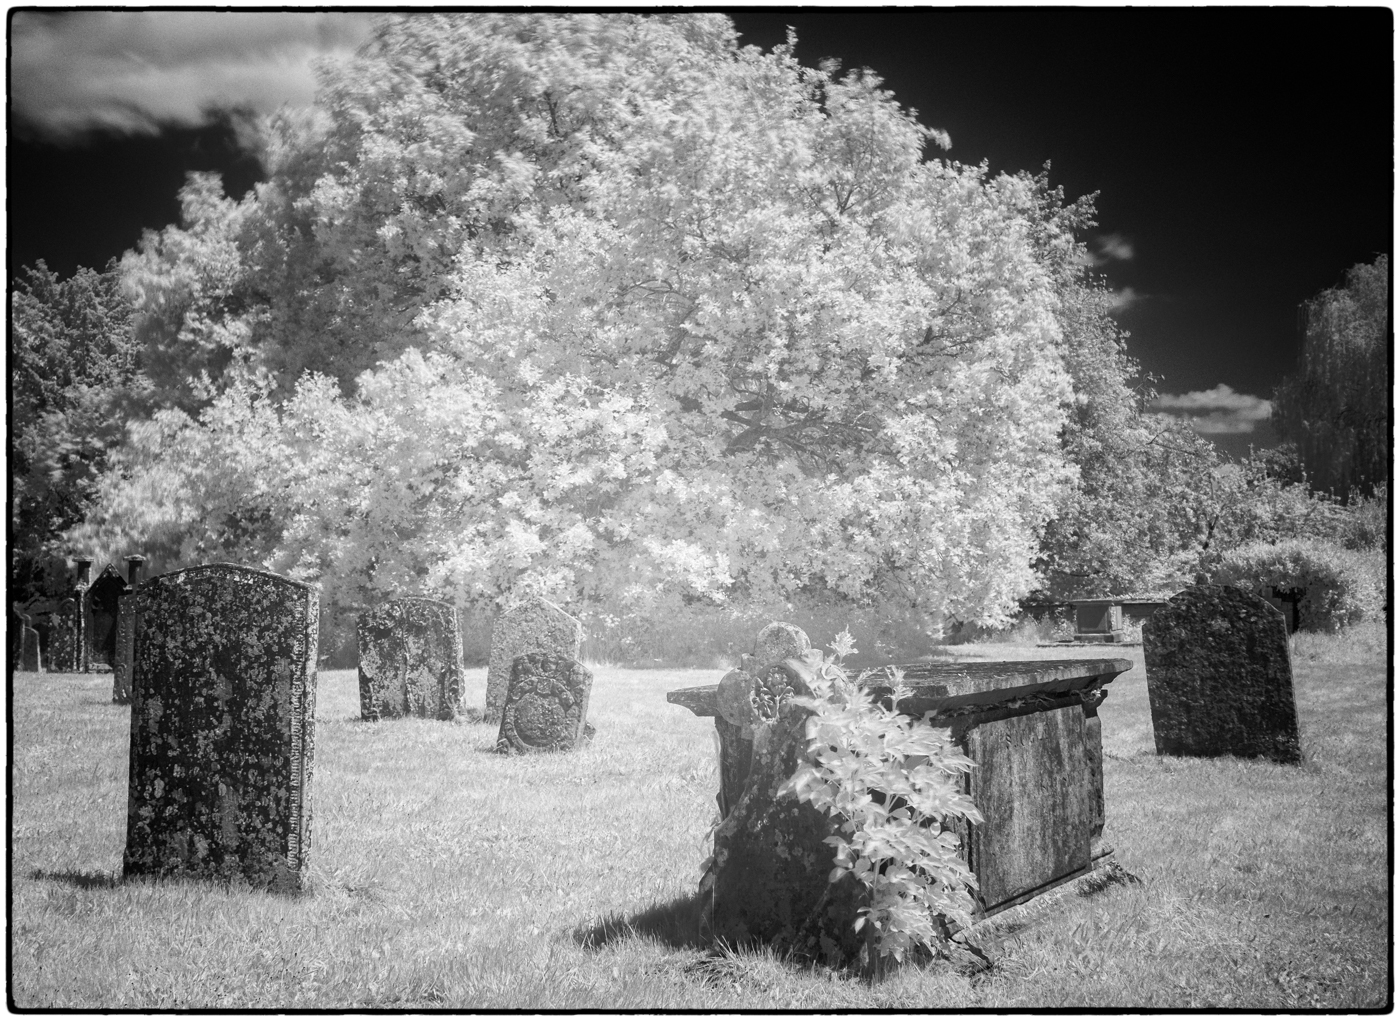
Simon took us through the basic or equipment and process then off we went to a lovely little churchyard not far from the workshop venue at Hampton Lucy, where we were able to put our new found skills into practice, either using our cameras with one of Simon’s filters, or one of Simon’s adapted cameras. I opted for my camera and an R72 and R85 filters as I would be using my camera in the future. Apparently some lenses result in hot spots when filming infrared, including my Fuji 16-55 2.8, however I had no such problem with mine, either then or since.

Back in the workshop venue, Simon took us through post processing both in Lightroom and Silver Efex pro for black and white and Photoshop for colour. The latter was new to me as well as I had never encountered ‘colour swapping’ before and that is another whole new ball game to get to grips with.

It was a thoroughly enjoyable day and we have been fortunate enough to have had the sunshine since for me to be able to practice now that I’ve got my own R72 filter for my Fuji lens. watch this space

Exploring Gum Bichromate

A couple of months ago I visited an exhibition for the first time in many months. ‘Squaring the Circles of Confusion: Neo-Pictorialism in the 21st Century’ at RPS House in Bristol, caught my attention initially because the advertisement I saw featured cyanotype prints, something I have been dabbling in for a little while. The work that really pulled me in was not Joy Gregory’s cyanotypes though but a gum bichromate work by Ian Phillips-McLaren entitled ‘Gwen, Did I want to be here’. I haven’t asked permission to show Ian’s work but it is available on his website, here

The back story to this work was really moving. Gwen, McLaren’s mother in law suffered from dementia. He had done a huge amount of research into the disease, and this work, a five foot high, multi layered gum bichromate print was a tribute to her. I was so taken it I decided to explore the process further.

There is a section on gum bichromate in ‘Experimental Photography: A Handbook of Techniques’ (Thames and Hudson, 2015), numerous YouTube videos of varying levels of usefulness and I discovered a ‘Domestika’ course, which was my real starting point.

To start with I have made do with materials I had; watercolour paper and tubes of pigment, Gum Arabic is readily available and I managed to source potassium dichromate which is very toxic and needs careful handling. The results weren’t wonderful but enough to get me hooked.

This is a very long and time consuming process. I used the method identified in the Domestika course which involved splitting the colour channels of an image into RGB (magenta, yellow and cyan), printing a separate negative for each channel then coating, exposing and drying each in turn. It is crucial that all exposures are registered absolutely accurately and you can see the pin marks where I have attempted to do that.

I found a ‘gum bichromate’ group on Facebook where the members are very generous with their feedback and guidance and through this group I was introduced to an absolute bible for gum printing. Anderson, Christina Z. Gum Printing. Routledge, 2017. it covers everything you could possible need to get started, from the history, to Anderson’s favourite pigments, to photoshop curves for printing the digital negatives, to a section on artists who use gum bichromate and other less toxic alternatives. As a result of this find I bought some new pigments and in my next experiment, used CMYK as opposed to RGB channels. The added K, (black) pigment makes a huge difference to the tones so I think this is probably the method I will use in future. The other thing I have learned from the FB group is that it is usually not enough to print each negative/pigment once. There are 9 layers in the attached images and it’s still by no means perfect!

According to Ian Phillips McLaren’s website it took him seven months to make ‘Gwen’ with only 1 two week break during the process, so I have a long way to go yet!

Its been a funny old time

It is now nearly 6 month since my last post, so much for new year resolutions! I had resolved to document my work too, another good intention down the drain but to be fair it has been a strange time and I don’t suppose I’m along in lacking motivation and discipline.

I have continued to experiment with cyanotypes, particularly the wet process, loving the randomness of the outcomes, never quite knowing what the result would be and I started really well, recording the exposure times, type of paper Io had used, any additives, etc. on the back of the print but that soon fell by the wayside and I now have a pile of prints and have to try to remember how I made them. Having spent the best part of 10 years working through OCA photography courses and wondering what the point was of keeping a blog and a sketchbook because they do the same thing don’t they? I now appreciate the difference.

So here we are 6 months on. I had intended this blog to be a fairly comprehensive record of my work as it was for my OCA courses but whilst I want to get to my current position, it would take to long to backtrack and put it all in. So, I will spend the next few posts sampling and recording highlights and take it from there. In the meantime to go back to January, this is a favourite clump of trees at the bottom of our lane, photographed in the snow in January, converted to a black and white negative and printed onto transparency film.

Exposed for 14 minutes on St Cuthberts Mill Saunders Waterford 100% cotton 300gm Acid Free

This is one where I did write the details on the back of the print, it makes such a difference!

Exploring cyanotype

Over the last few months I have been experimenting with cyanotypes with varying degrees of success. I started with a kit which included the ready prepared chemicals as well as paper and instructions and from there have progressed to the ‘wet’ process which I find fascinating, though unpredictable. Initially my images were quite dark until it was pointed out to me that I was probably over exposing the prints, however a test strip at the start of each session has rectified that – at least with the traditional ‘dry’ process. This isn’t quite so easy with the wet process though as the required exposure time is longer.

Recently, I have experimented adding different mediums to the treated paper, vinegar, turmeric, soap suds etc., and the results have been quite pleasing, though still unpredictable and I have to say I have been a bit tardy when it comes to keeping an accurate record of my experiments. My intention is that this blog will provide the vehicle for proper record keeping as well as displaying my work

My first post

This blog has been a long time coming. I started setting it up back in April 2020, a month into the first lockdown, thinking I would have plenty of time to get it up and running at a time when there was little else to do. Ten months later I have decided that I either need to get on with it or abandon it altogether. I have decided on the former, so here we go!