Artquestlondon 30/30 Day 6

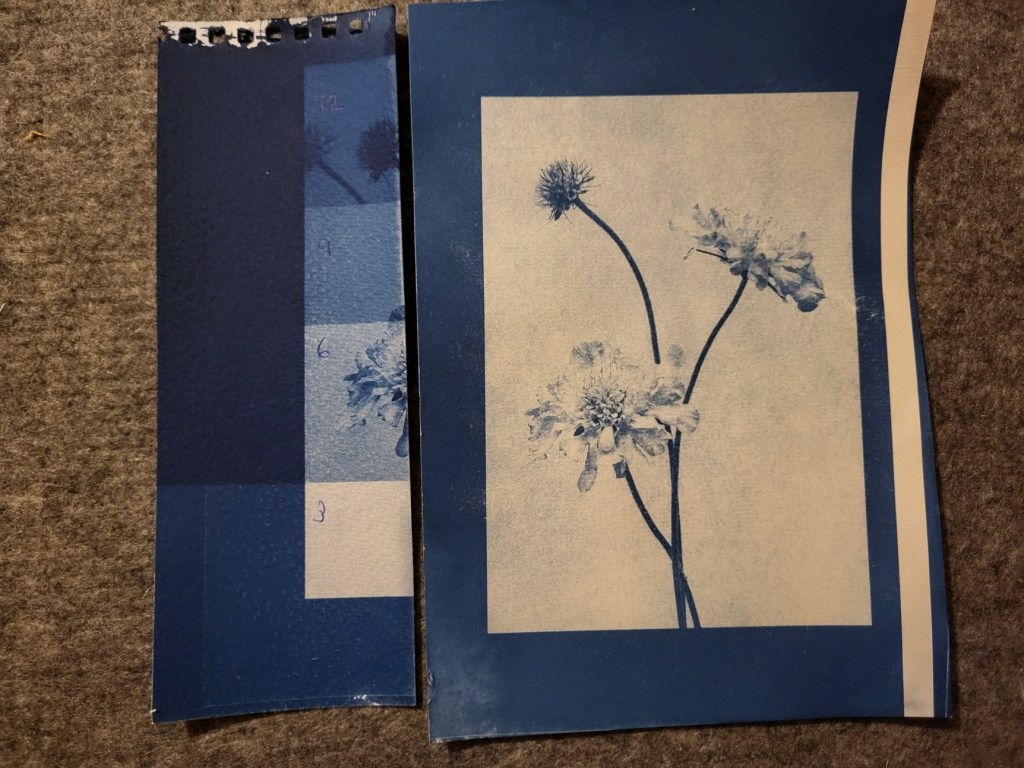
I thought after yesterday’s test strips I was just about there as it seemed to me that 9 minutes was about right on the paper I had tested. Not so however as when I printed the actual image at 9 minutes it was very over exposed., I did another at 6 minutes with the same result. As I said in my last post, this lamp is more powerful than my old one, I hadn’t realised just how much.

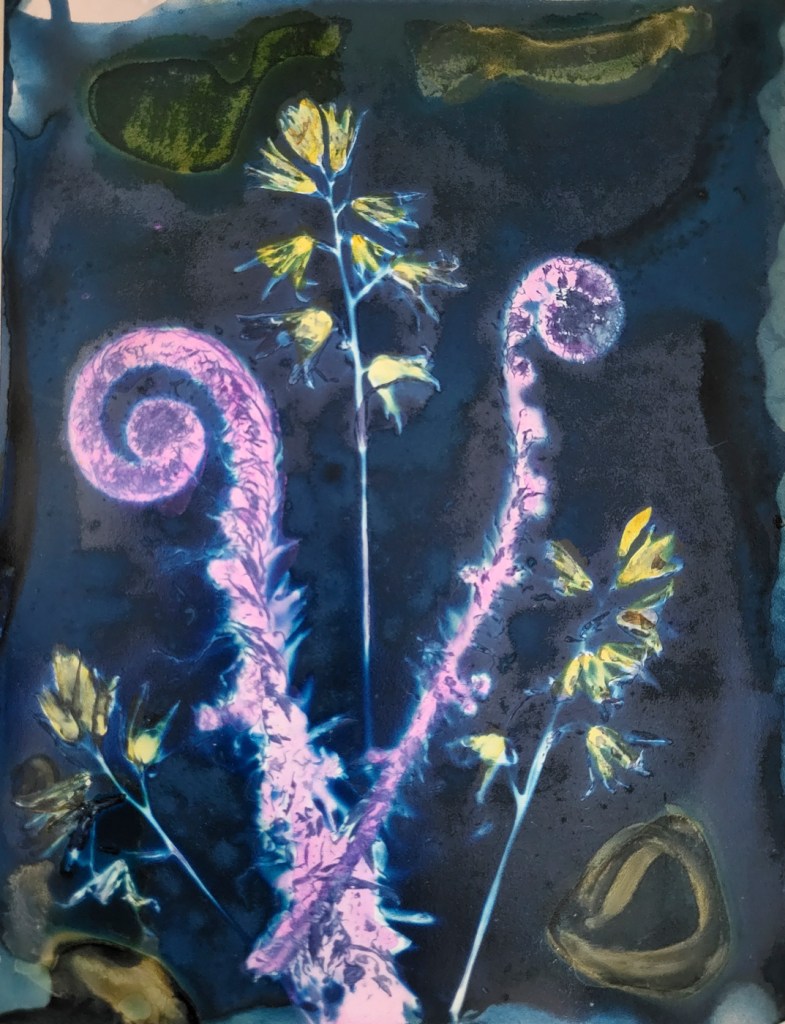
I had two sheets of precoated cyanotypes left from a pack I had purchased last year to make cyanotypes with the year 6 children in our local school and thought I would try exposing those at 3 minutes to see what happened.

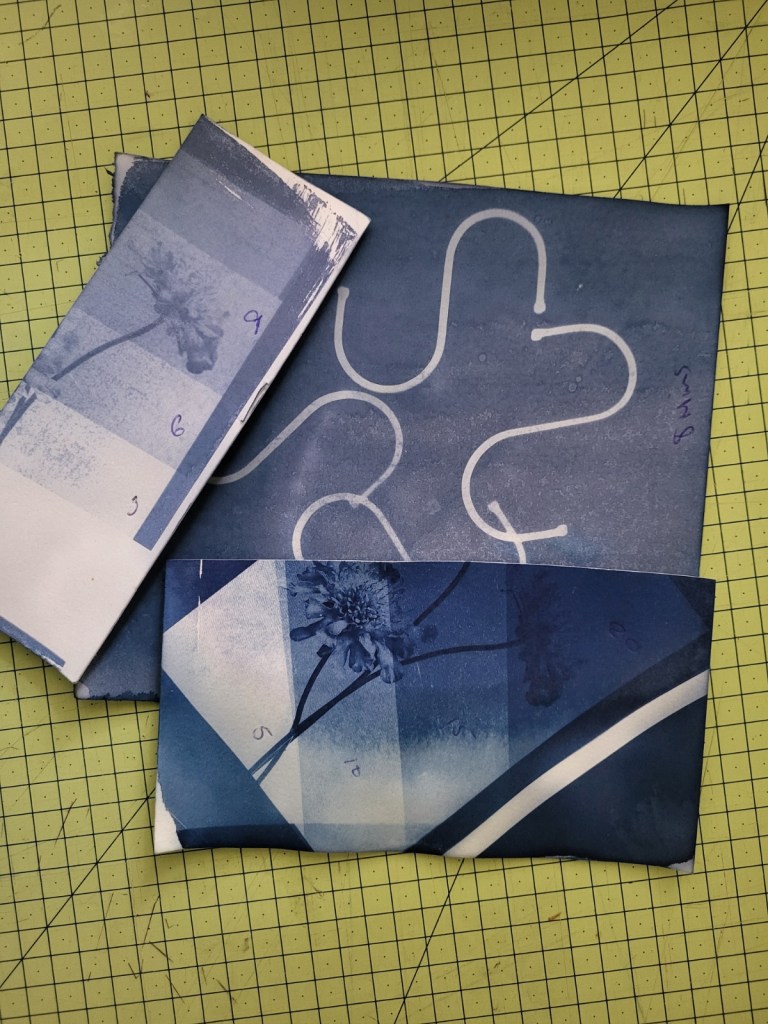
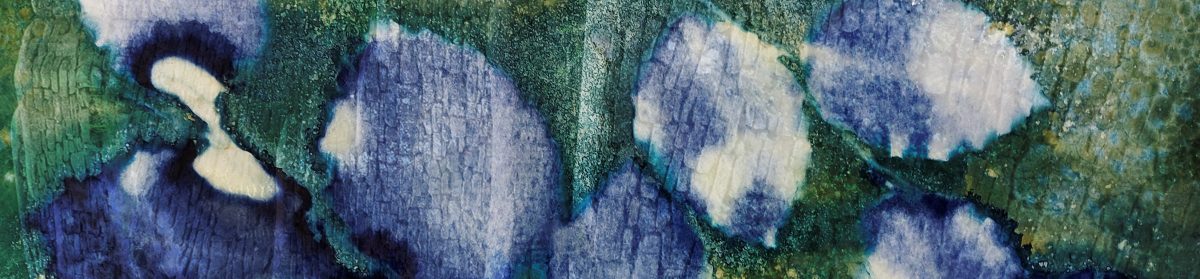
I’m not quite sure what had happened with the digital negative of the scabious flower, maybe it wasn’t inverted, but I got a better result then I’d had at 6 minutes so it did the job.

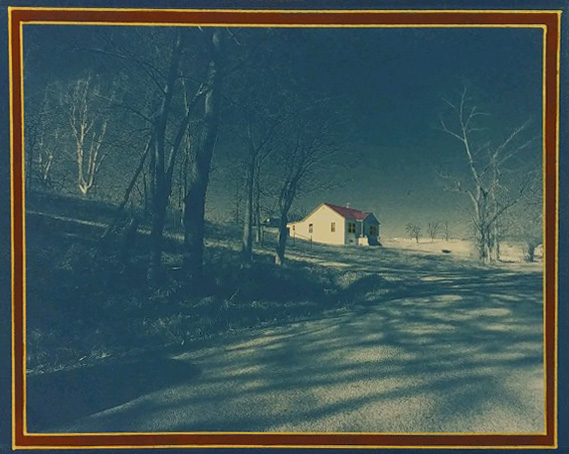
I then used the second sheet of paper to print the old crofthouse I had intended to make in the first place.

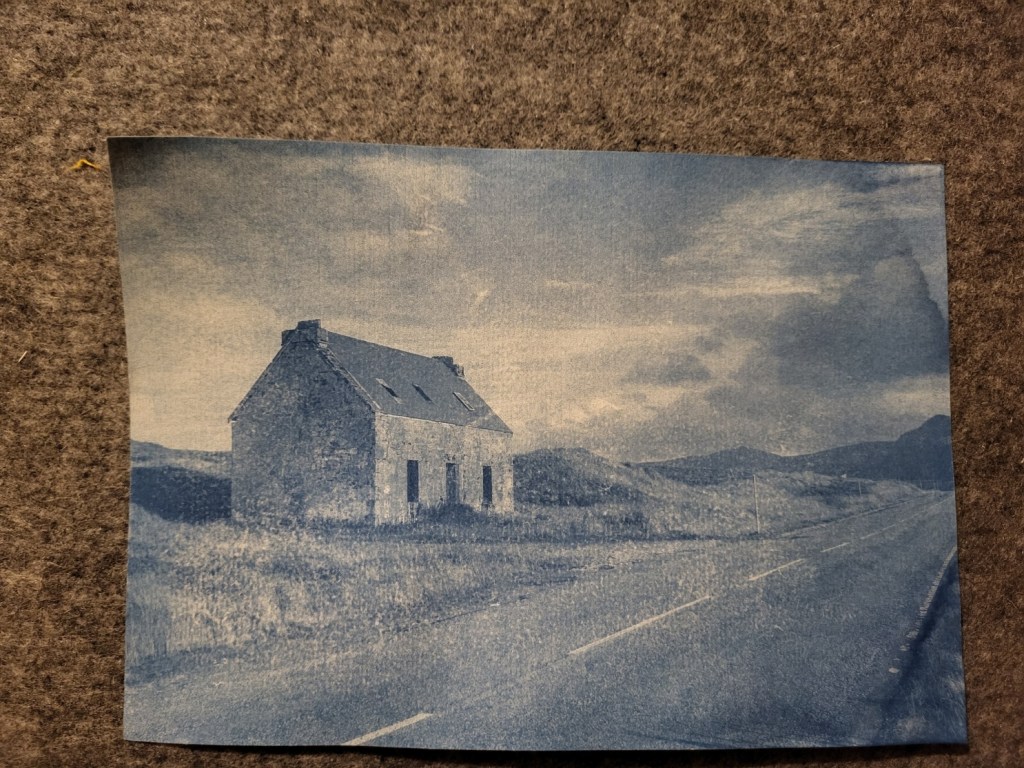
This was cheap paper which was already partly exposed at one end so while this print is not the quality I would be happy with, it does give me a starting point for tomorrow’s experiments which I will make on decent watercolour paper.

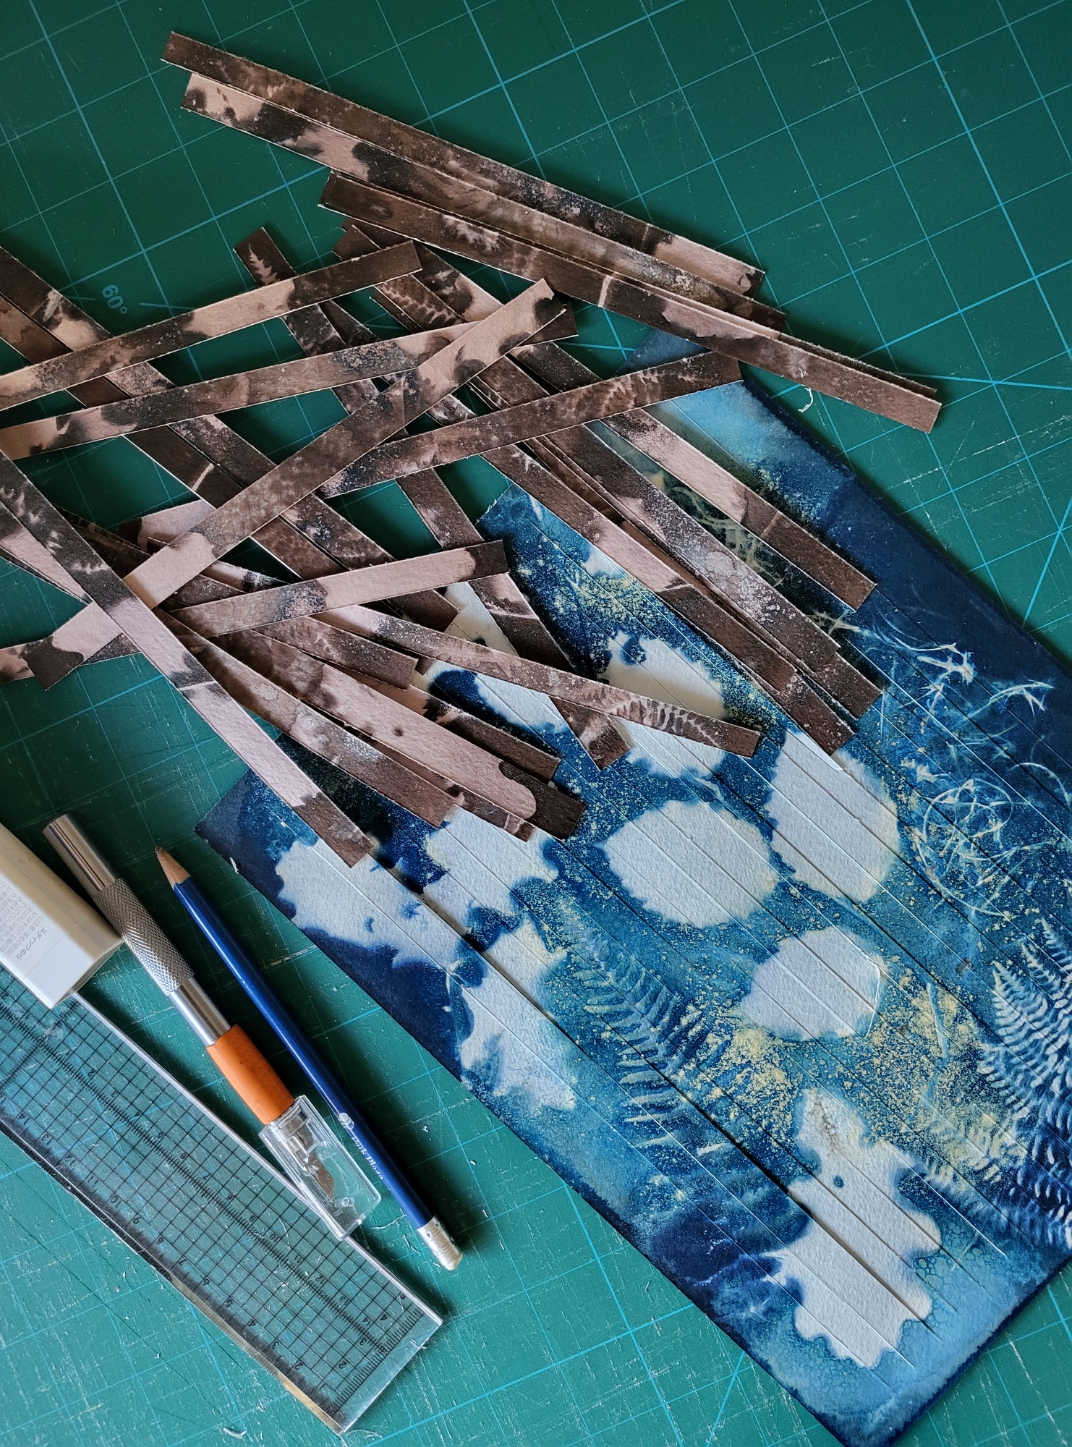
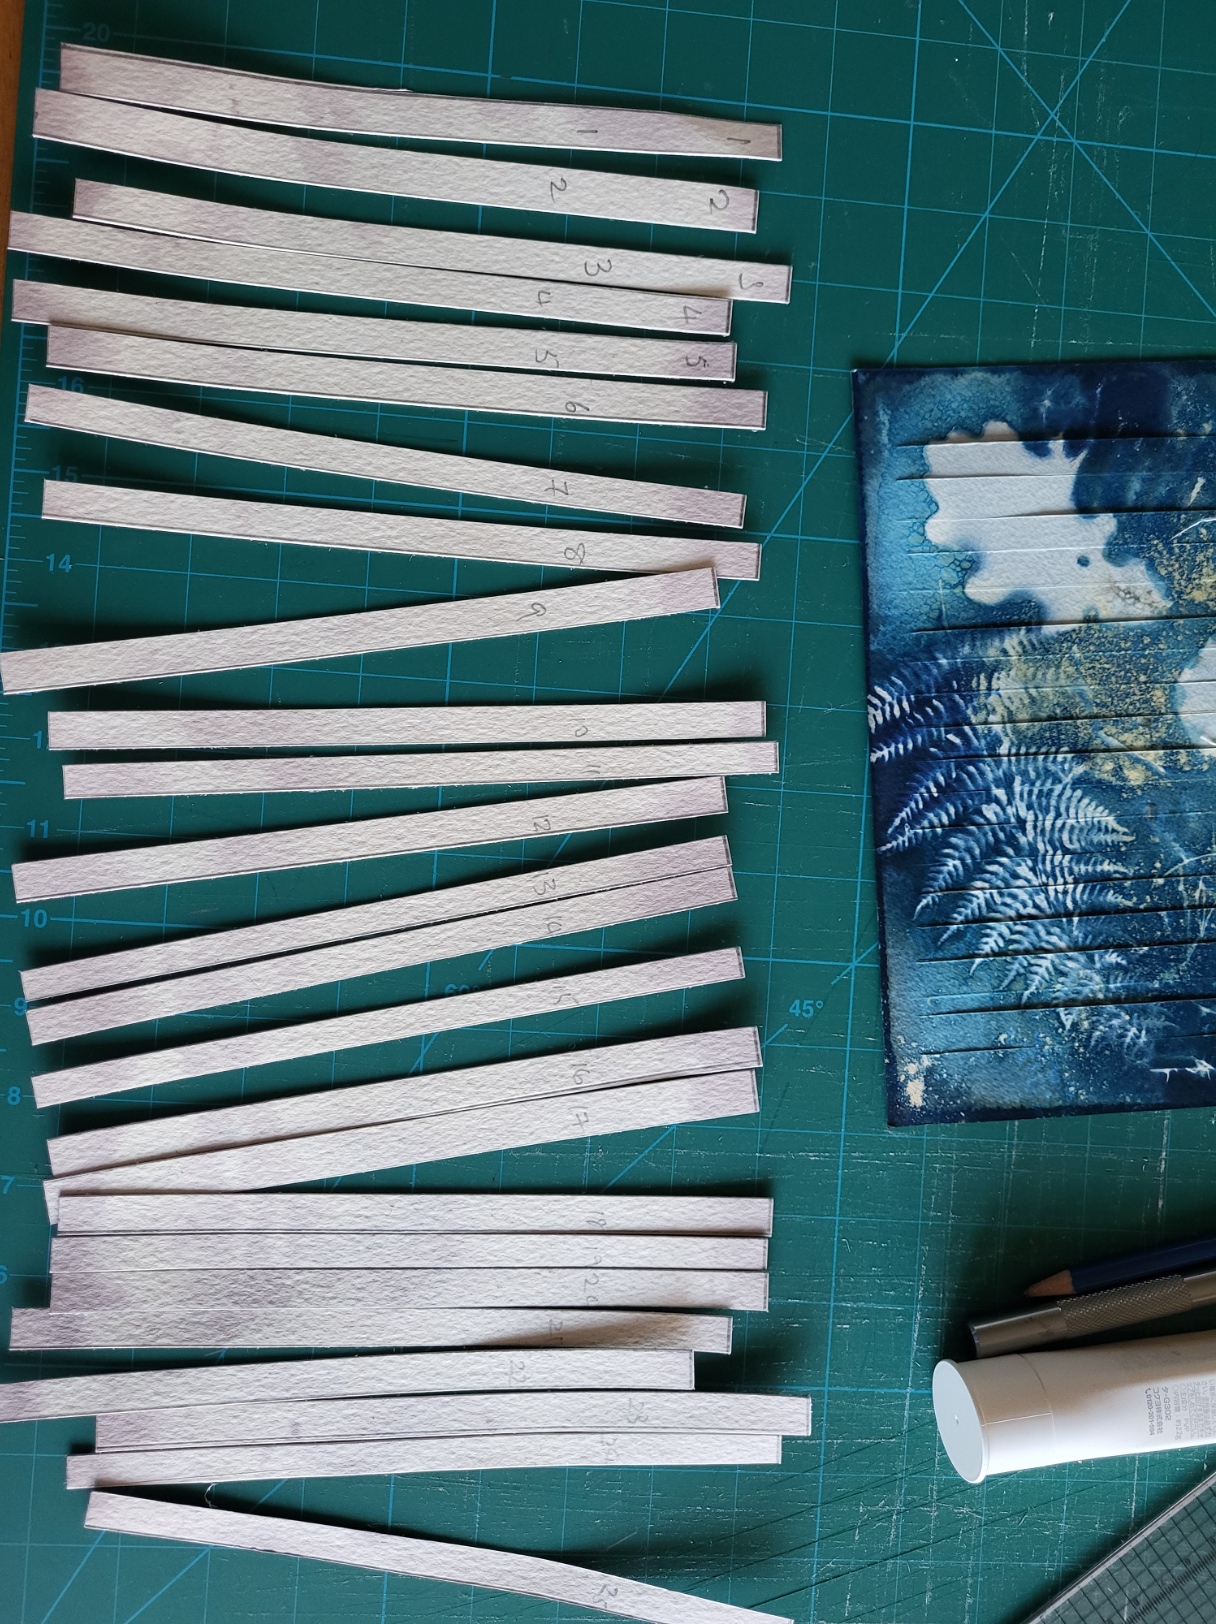
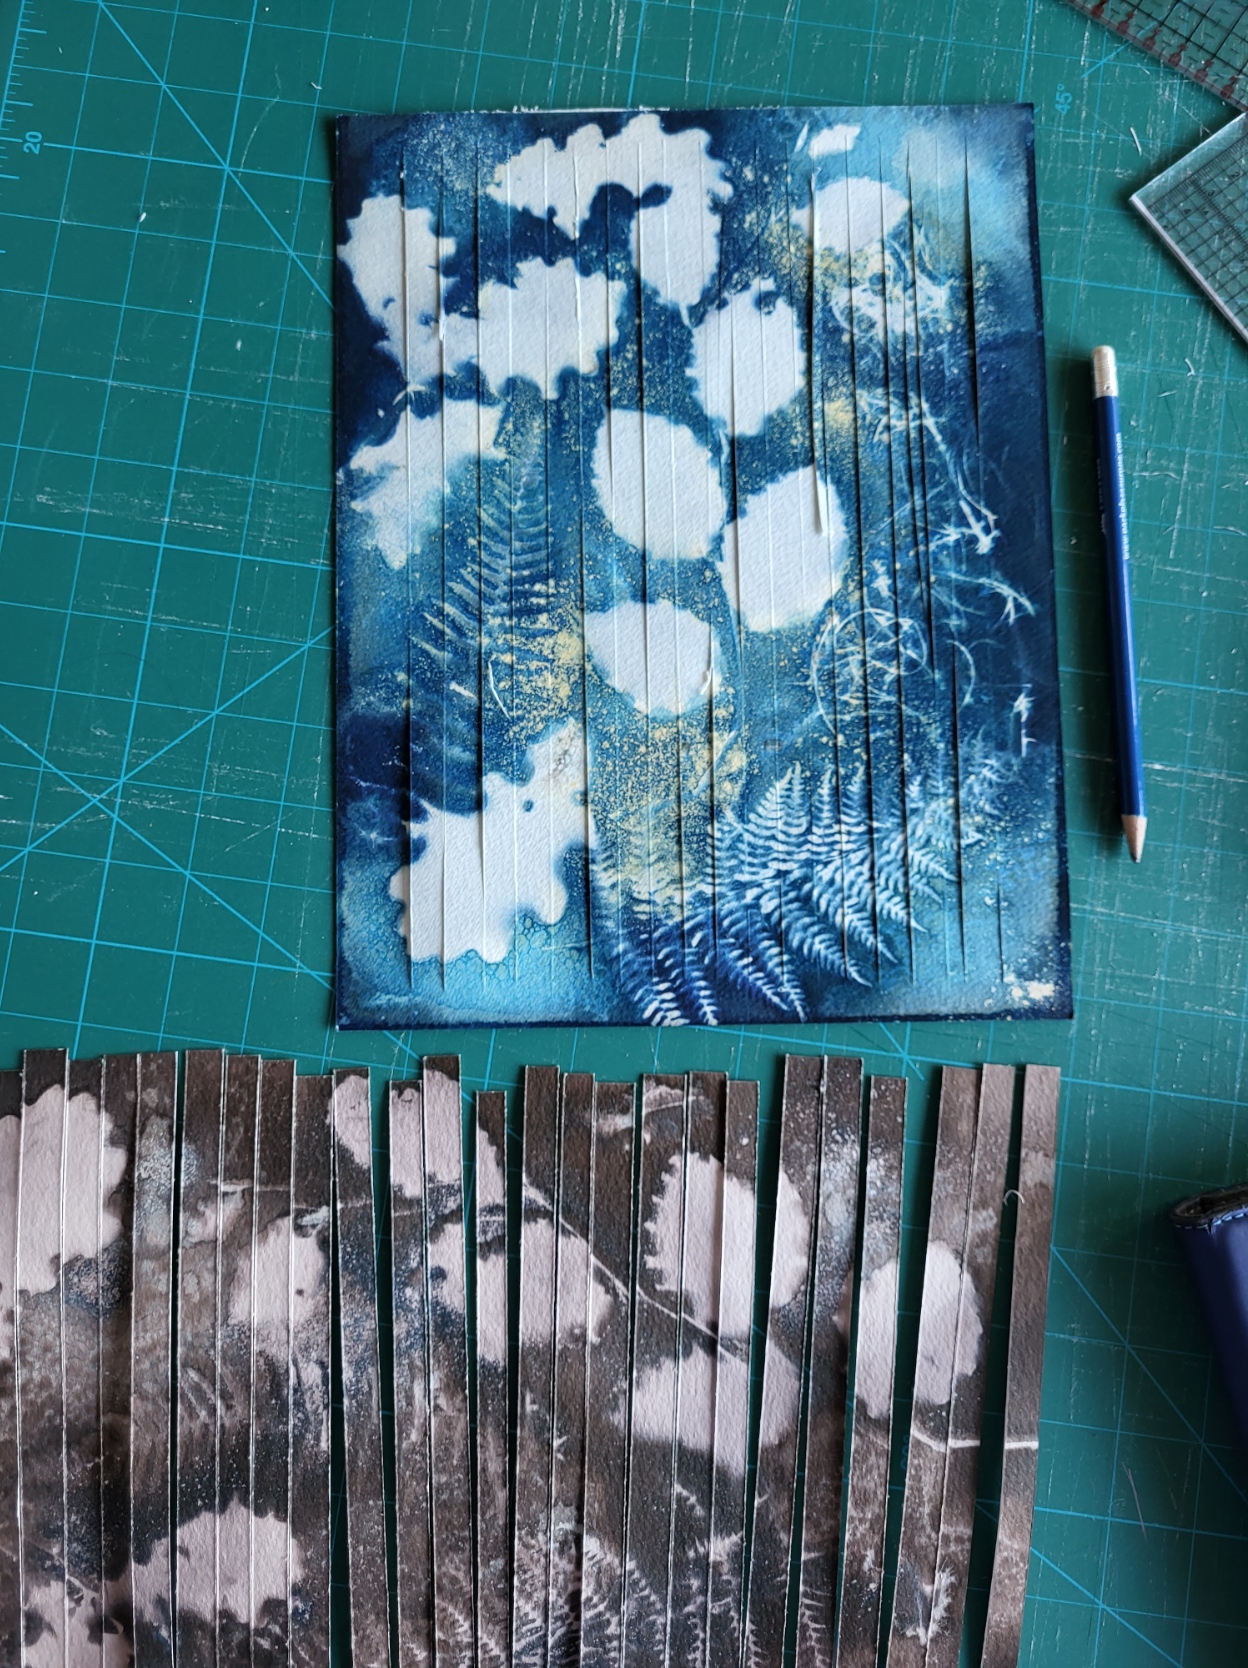
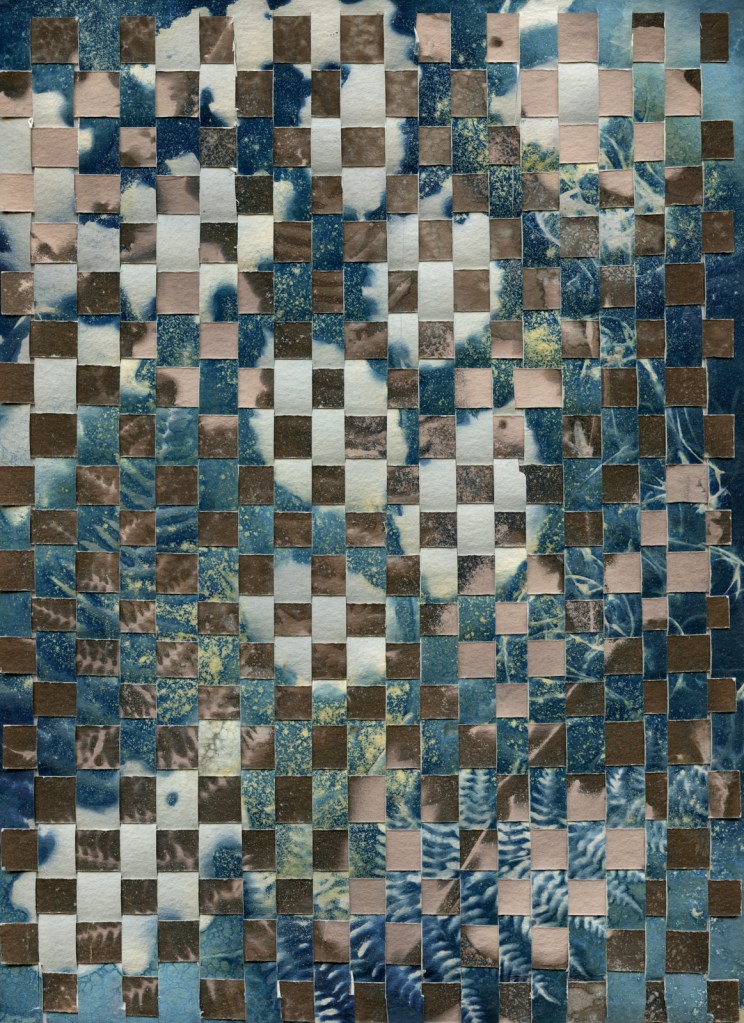
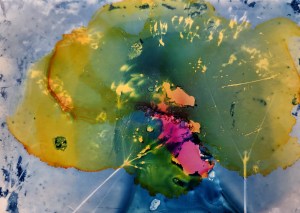
All is not entirely lost with the over exposed prints either though. I have bleached both and toned one with green tea. They are currently drying and tomorrow I intend to weave them along with the one above and see what results. More a question of reuse, recycle and reclaim again rather than following today’s hint with was ‘Try cheating today’.

Artquest 30/30 Day 5 – Boring but necessary

Some months ago, about 18 to be precise, I bought a new Ultraviolet lamp for my cyanotypes and gum bichromate prints and I have done nothing with it since. The main reason being that for printing, it needs to be hung with the light facing downwards onto the material to be printed and I needed to get a bracket of some sort to hang it onto. It recently dawned on me that my tripod has a boom arm allowing you to photograph with the camera facing downwards, and this is perfect for what I need.

The lamp is quite heavy but I have been able to balance it by hanging a sports weight from the tripod end.

This lamp is more powerful than my old lamp and the distance from the material being printed is different too and varies according to how the tripod is adjusted so I needed to make some test strips before I could move on to the real thing. I used 2 different papers as a starting point and exposed the first one 3 minutes apart, the second 5 minutes apart and based on those results, the final one with the S shaped hooks, for 8 minutes, which looked about right.

All papers are different and require different exposure times, so tomorrow’s job is to do some more test prints using digital negatives, fine tuned with a customised curve for cyanotypes produces in photoshop and hopefully after that, I will be ready to make a proper print.

Artquest 30/30 Day 2

My first thought when I saw my toned print this morning was ‘Oh dear’, it was quite a lot darker than I had though last night but it is all part of the learning process. I had planned to weave my prints from yesterday and that is what I would do. I have very little experience of weaving photographs so did a little research. One short video I came across, link below, suggested I cut one photograph in vertical strips but keeping the frame intact and the other into horizontal strips. Preparation usually pays off and I felt this would help keep the piece together as I worked so followed this process.

I numbered the horizontal strips so that they were added in the correct order, having taken a photograph of the intact sheet first which proved to be useful as I needed to refer to it on several occasions. This method worked ok until I got near the bottom of the piece when it became difficult to weave the horizontal strips in. Both cyanotypes were made on fairly heavy watercolour paper and it needed to be softer and more pliable for weaving. In the end I had to open up the bottom of the vertical strips to complete the work. Even pulling each stip up as tightly as I could, I was left with 4 horizontal strips which wouldn’t fit in, again, partly I think due to the weight of the paper. I think next time I will leave the top of both sheets intact so that I have a solid top and left side to work from, also print the cyanotype onto thinner paper.

Thinking about tomorrow, I have 2 cyanotypes, both featuring ferns, printed onto fabric. maybe I’ll see what I can do with them.

https://www.google.com/search?q=weaving+photographs&oq=weaving+photograpsh&gs_lcrp=EgZjaHJvbWUqCQgBEAAYDRiABDIGCAAQRRg5MgkIARAAGA0YgAQyDQgCEAAYhgMYgAQYigUyDQgDEAAYhgMYgAQYigUyDQgEEAAYhgMYgAQYigUyCggFEAAYgAQYogQyCggGEAAYgAQYogTSAQkyMjczN2owajeoAgCwAgA&sourceid=chrome&ie=UTF-8#fpstate=ive&vld=cid:4d199a52,vid:Lm8Y42T10n0,st:0

I’ve had a bit of a breakthrough

Yet another experiment resulted in a disappointing outcome, although there was a hint of possibility in my last but one experiment because I seem to have a better consistency of cyanotype chemicals and gelatine. There is still a problem coating the paper, partly I think because the cyanotype emulsion is diluted too far with the gelatine so is too weak but also, its still does not adhere well to the shiny surface. As a result I doubled up the exposure time and still felt it could have done with longer.

But, after following my bullet points from the last post, leaving the print overnight before washing, soaking for 5 minutes in iced water, then washing, I have a print with some evidence of cyanotype as well as ink.

It is a pretty rubbish image but the purpose was to experiment getting the emulsion to stick to the shiny paper without using more resources rather than creating a work of art, so I will persevere and see what materialises.

I have however had a little bit of a breakthrough in that someone on the Facebook Cyanotype page posted some images she created using cyanotype and alcohol ink. Her process is different but I think very successful.

Cyanotype tinted with alcohol ink by Leigh Wallace

Leigh mixes her own chemicals, exposes, adds vinegar to the rinse then hand tints with alcohol ink diluted with a little water. The gold border is also added this way. I think this is stunning and would certainly hang it on my wall!

As I am still very much in the experimental stage and as previously mentioned, keen not to use too many expensive resources in the process, I have gone back to an existing print to try this out. My first question was why dilute in water rather than more alcohol, so I have tried both. This is a cyanolumen from a couple of weeks ago on the left and the tinted version on the right.

In the tinted version, the pink, or ‘plum purple’ as it says on the bottle, is diluted in water, whereas the yellow is diluted in isopropyl alcohol. I actually found the ink diluted with alcohol easier to work with. It dries more quickly and it seems to have a more translucent quality. I also painted some of the yellow on the blobs and quite liked the effect that gave. There are so many variables though and each impacts differently on the outcome.

For example, this print was made on expired dark room paper, Kentmare Bromide Stipple, and that may have an impact, so next experiment with be on the watercolour paper I usually use for cyanotypes. For the first time in a couple of weeks though, I am starting to see a glimmer of light at the end of the tunnel.

Introduction to Infrared

A few weeks ago I attended a workshop at the Photographic Academy at the Imaging Warehouse in Stratford on Avon, on Infrared Photography. I’d been toying with this for a while and was inspired by a couple of people I follow on twitter, so when I found this workshop an hour from home, I thought I’d give it a go. The workshop was run by Simon Weir, https://www.simonweir.com/, whose main specialism is producing and photographing classical music performances but his infrared photography is stunning. There were 6 of us, all mail apart from me and all complete novices when it comes to IR. I had previously run an infra red film through an old Canon A1 with an R72 filter but but was such hard work trying to compose and focus, then add the filter and try to figure out how much to adjust the exposure by, it ended up being quite an expensive experiment.

Simon took us through the basic or equipment and process then off we went to a lovely little churchyard not far from the workshop venue at Hampton Lucy, where we were able to put our new found skills into practice, either using our cameras with one of Simon’s filters, or one of Simon’s adapted cameras. I opted for my camera and an R72 and R85 filters as I would be using my camera in the future. Apparently some lenses result in hot spots when filming infrared, including my Fuji 16-55 2.8, however I had no such problem with mine, either then or since.

Back in the workshop venue, Simon took us through post processing both in Lightroom and Silver Efex pro for black and white and Photoshop for colour. The latter was new to me as well as I had never encountered ‘colour swapping’ before and that is another whole new ball game to get to grips with.

It was a thoroughly enjoyable day and we have been fortunate enough to have had the sunshine since for me to be able to practice now that I’ve got my own R72 filter for my Fuji lens. watch this space