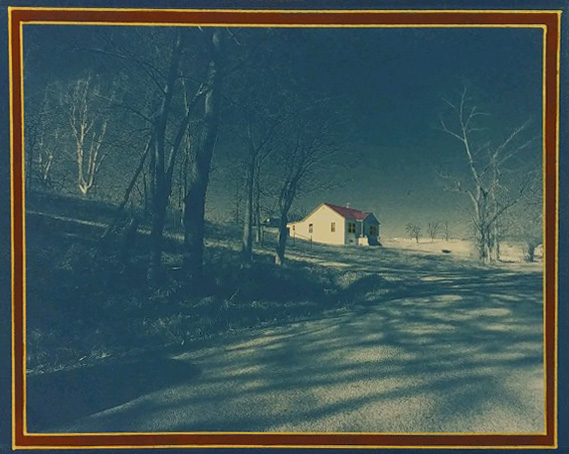
I’d like to know what makes the person, who chooses these hints, tick, if it is a person that is, which I’m beginning to doubt’. And yes, I know, I could just ignore them. I’m not sure what though, but something in me wants to keep responding to them. I suppose it keeps my brain ticking over. So, if I made a cake, it would be gone by the end of the day but is that a piece of art? Or maybe I should make a video of the freezer defrosting? Hmm, maybe not.
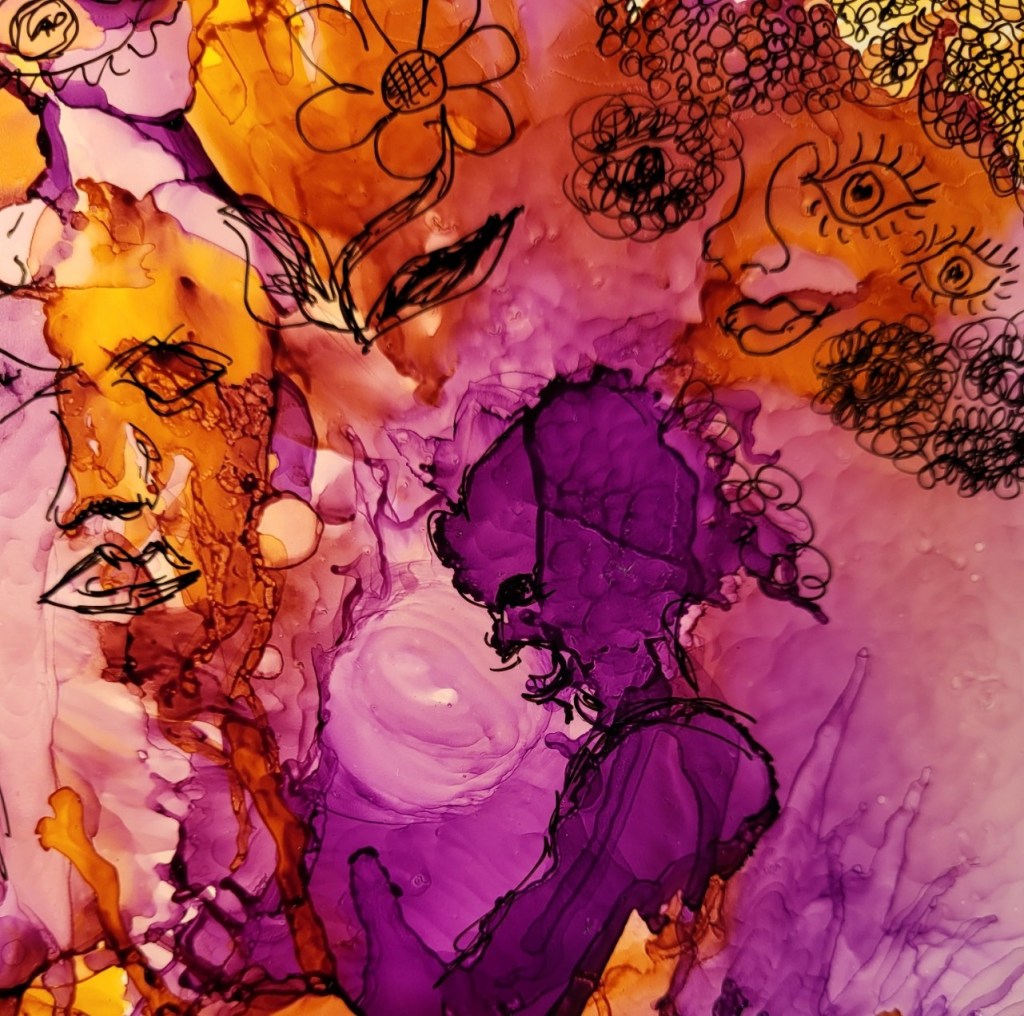
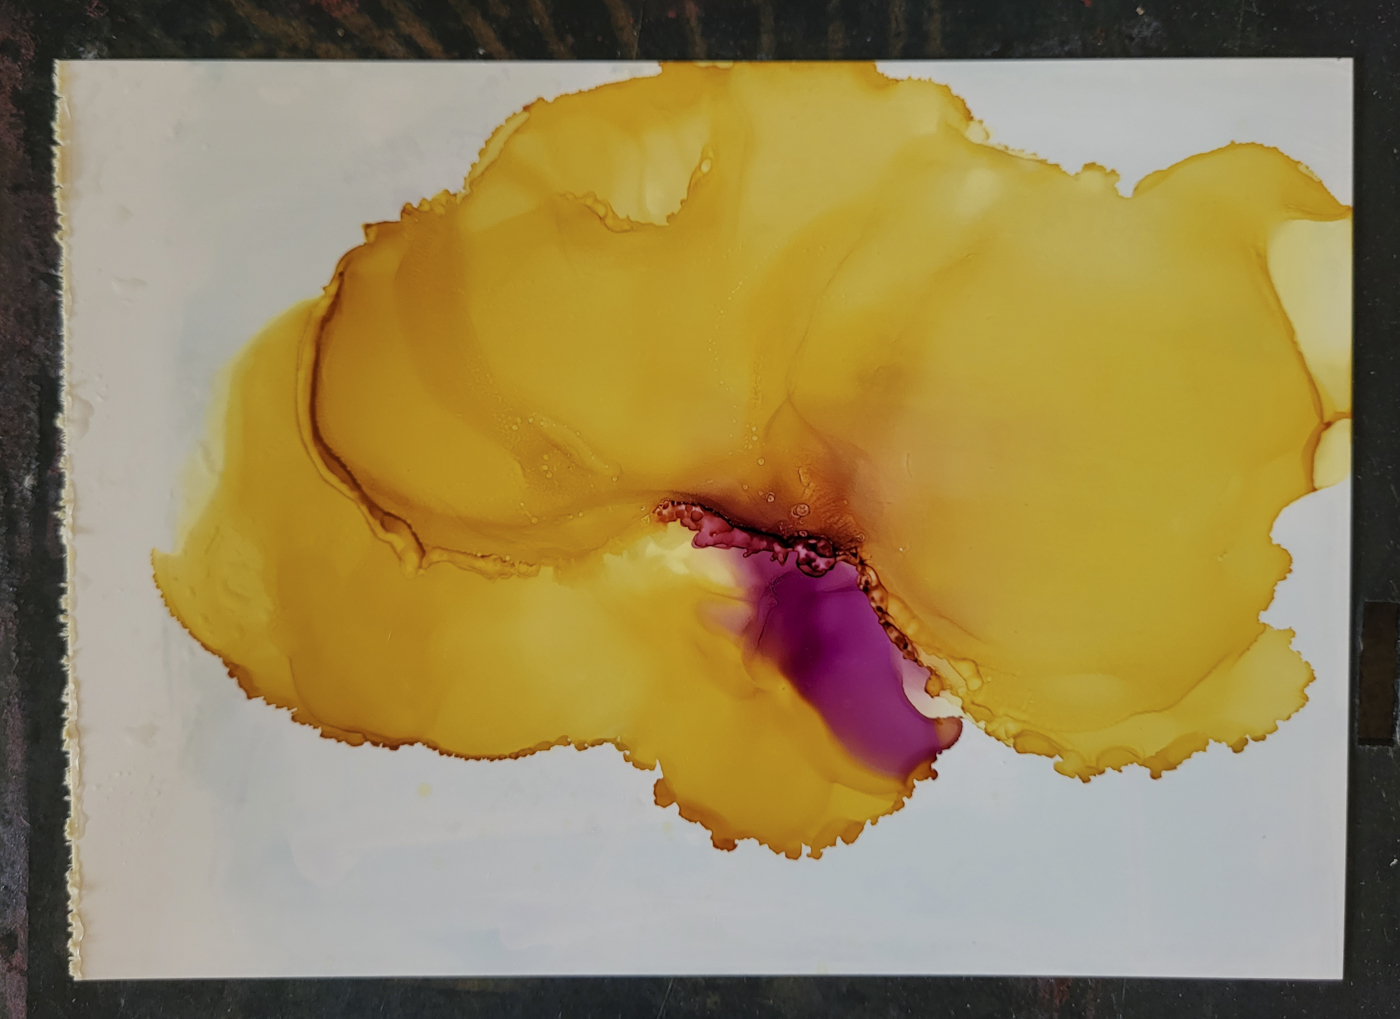
When I posted my alcohol ink piece on Instagram the other day, my daughter made a comment about collaborating as she likes to doodle and her work really is beautiful. I got to thinking that if I doodled all over that piece, the original image would disappear or at least be change beyond all recognition so I have made a start doodling. I used to draw eyes on all of my jotters at school, so I started with eyes, then progressed to flowers and some squiggles and before I knew it, I started to see faces. Maybe if I continue with this whilst watching the masked singer tonight, which I think is quite appropriate, I will cover the whole piece and who knows what I will reveal.
This is nothing new for me as I always have several things on the go at the sometime. I currently have a 52 week sewing challenge which I plan to post about. I have also started a 6 week Photoshop Zoom session on Friday evenings and I have a ‘multiple exposure’ workshop coming up this weekend. And that is besides, the usual home duties and school governor role. So, this was literally 10 minutes snatched whilst making the dinner. This hint also fitted nicely with yesterday’s about changing your practice so I have combined the two.
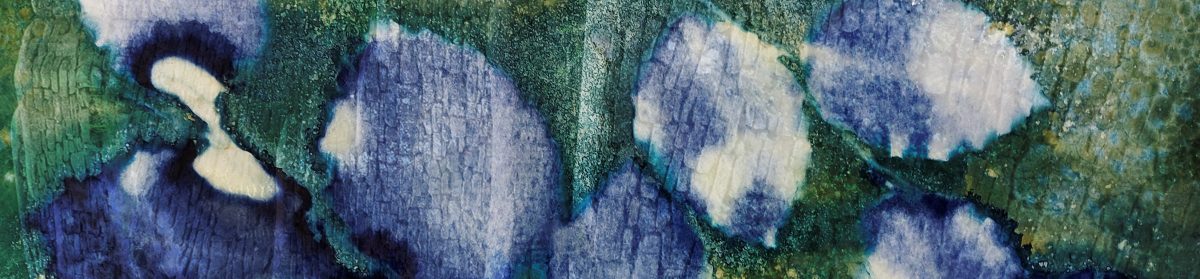
It is a while since I played around with alcohol inks and a hairdryer and like some of the other alternative processes I have tried, the results are very hit and miss, at least they are for me. My new hairdryer is obviously quite a lot stronger than the one I used previously as I didn’t feel I had much control but it was something completely different and ws literally done in the ‘in-between times’.
Like a lot of these processes, and I guess that may be the point of this challenge, it has made me think about getting the inks out again and sitting down and having another go.
Yet another experiment resulted in a disappointing outcome, although there was a hint of possibility in my last but one experiment because I seem to have a better consistency of cyanotype chemicals and gelatine. There is still a problem coating the paper, partly I think because the cyanotype emulsion is diluted too far with the gelatine so is too weak but also, its still does not adhere well to the shiny surface. As a result I doubled up the exposure time and still felt it could have done with longer.
But, after following my bullet points from the last post, leaving the print overnight before washing, soaking for 5 minutes in iced water, then washing, I have a print with some evidence of cyanotype as well as ink.
It is a pretty rubbish image but the purpose was to experiment getting the emulsion to stick to the shiny paper without using more resources rather than creating a work of art, so I will persevere and see what materialises.
I have however had a little bit of a breakthrough in that someone on the Facebook Cyanotype page posted some images she created using cyanotype and alcohol ink. Her process is different but I think very successful.
Cyanotype tinted with alcohol ink by Leigh Wallace
Leigh mixes her own chemicals, exposes, adds vinegar to the rinse then hand tints with alcohol ink diluted with a little water. The gold border is also added this way. I think this is stunning and would certainly hang it on my wall!
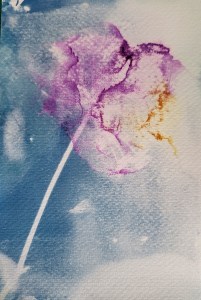
As I am still very much in the experimental stage and as previously mentioned, keen not to use too many expensive resources in the process, I have gone back to an existing print to try this out. My first question was why dilute in water rather than more alcohol, so I have tried both. This is a cyanolumen from a couple of weeks ago on the left and the tinted version on the right.
In the tinted version, the pink, or ‘plum purple’ as it says on the bottle, is diluted in water, whereas the yellow is diluted in isopropyl alcohol. I actually found the ink diluted with alcohol easier to work with. It dries more quickly and it seems to have a more translucent quality. I also painted some of the yellow on the blobs and quite liked the effect that gave. There are so many variables though and each impacts differently on the outcome.
For example, this print was made on expired dark room paper, Kentmare Bromide Stipple, and that may have an impact, so next experiment with be on the watercolour paper I usually use for cyanotypes. For the first time in a couple of weeks though, I am starting to see a glimmer of light at the end of the tunnel.
Over the last week or so I have continued to experiment with alcohol ink and cyanotype mixed with gelatine. I’ve not yet learned what I can do but I have learned quite a lot about what doesn’t work!
I found another of Jo Howell’s blogs in which she talks about working with cyanotype on glass and thought this principle might work on the Yupo paper I have been using. In this blog, Jo discusses how she dilutes the gelatine and how much cyanotype chemical she adds, so that was my starting point. Jo said she followed the guidance for dissolving the gelatine but used less water than the suggested pint, so that it fitted into her lightproof bottle – not sure how big that was though! I diluted my gelatine up to about 1/2 pint, added the cyanotype chemicals, 25 ml of each, then the solution was allowed to cool overnight by which time it had turned into a fairly loose jelly.
My first mistake was to use this to coat the paper but when I re-read Jo’s blog, she warmed the solution up slightly so that it was in liquid form.
As you can see, the paper isn’t very well covered and once exposed, you can clearly see areas not coated at all.
I did have hope of another happy accident but that was not to be because when I washed the paper, all of the cyanotype washed off, leaving the paper as it was before any cyanotype had been applied. When I went back to Jo’s blog again, she talked about soaking the exposed paper in very cold water to set the cyanotype before washing whereas I had just ran it under the tap.
So, the next stage will be:
Warm cyanotype/gelatine mix before coating
Make sure paper is super clean – Jo makes the point that if it isn’t the solution will pool around the dust.
Expose – not sure for how long. the last print was exposed for 10 minutes so I will try 20 next time.
Maybe leave overnight to harden? I will try one with and one without
Soak in ice cold water for 5 minutes to set gelatine
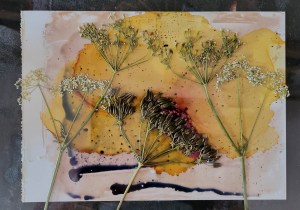
Following on from my last post, I decided to take my experiments with cyanotype and alcohol ink a little further because in neither case I had got exactly what I was looking for.
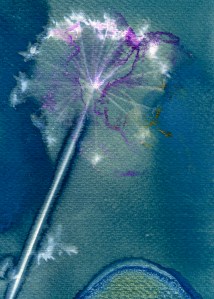
In the second print in my last post, which was on watercolour paper, whilst I quite liked the painterly effect, the whole thing was under exposed, either that or the PVA size, which I had added to allow me to manipulate the ink, had stopped the cyanotype chemicals from being absorbed into the paper. Either way, I needed to work out what was happening. So, I coated the paper and exposed it again, carefully placing the same seedhead onto the wet paper.
I didn’t add any of the additional extras that I would normally add to wet cyanotypes, such as vinegar, turmeric or soap suds, one thing at a time!
The resulting print is certainly more like a cyanotype than the previous attempt. I do need to think more carefully about what effect I want from the ink, so more practice needed there. I also need to take my time and do some test prints to get the exposure right. This one, being wet , was exposed for several hours, then left overnight before I removed the plant material and washed the print. In the end, it was washed for quite a long time to get as much chemical out as possible as the print was quite dark.
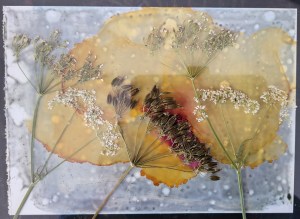
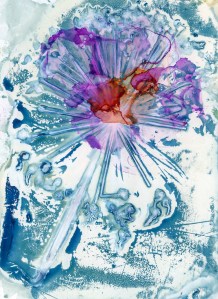
I mentioned in my last post that Yupo paper is quite expensive. Too expensive to experiment with really, but there doesn’t seem to be a right or wrong side and as the chemicals don’t soak into the paper, I decided to try my second experiment with this, on the reverse of the first print.
First time round, I felt that the consistency of the gelatine was too thick, so after a few more YouTube searches, I diluted it further. I’m still not sure I have the ratio of gelatine to cyanotype chemicals correct, if anything, I may have diluted the gelatine too far this time, as the solution did not adhere to the paper was well as I’d hoped. Again, this was exposed whilst the paper was still wet and again, whilst not what I had expected, it does have potential and I do quite like the painterly effect.
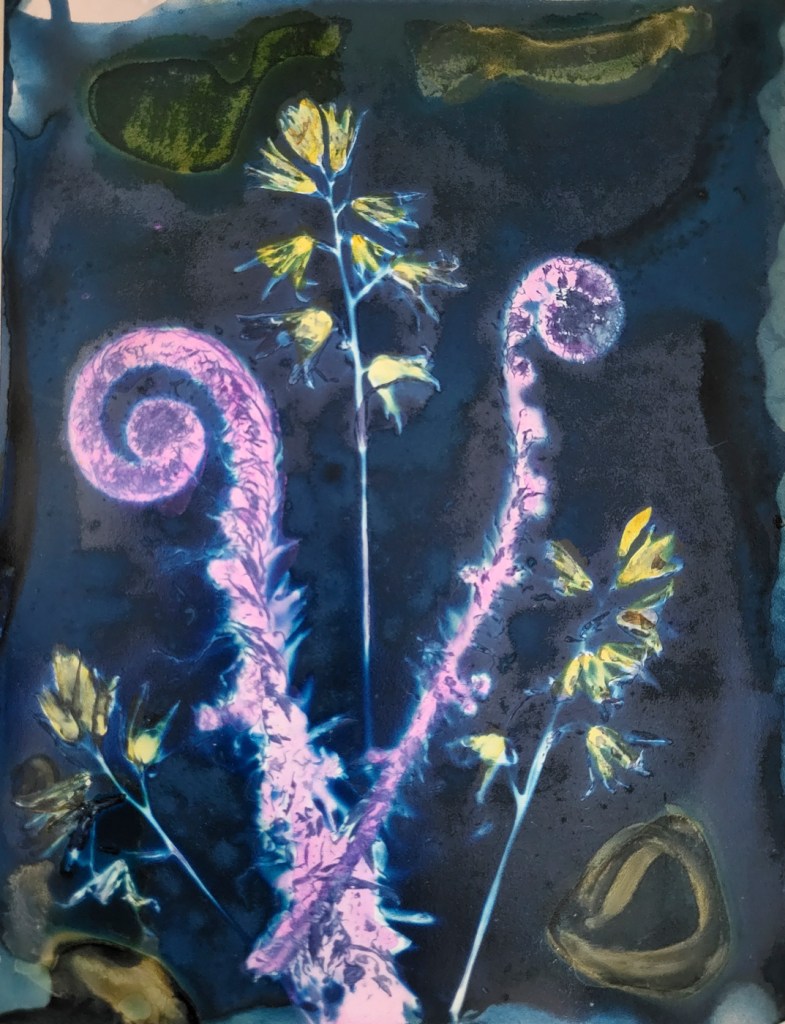
My final print from this session was a wet cyanolumen on expired Kentmere Bromide Stipple darkroom paper. Again I added a little of the gelatine mix to the coating solution as last time I used this paper, I found that the cyanotype chemicals did not adhere to the paper very well. The only problem I had this time was that the plant material stuck to the paper so I had to soak it the whole thing in order to remove it. The plant material here is bluebells and ferns pressed last year and then forgotten about. This print was fixed in Ilford Rapid Fixer. Do I need to do that with a cyanolumen? I know I need to fix lumen prints but not sure if I need to fix cyanolumens too, need to check that one out!
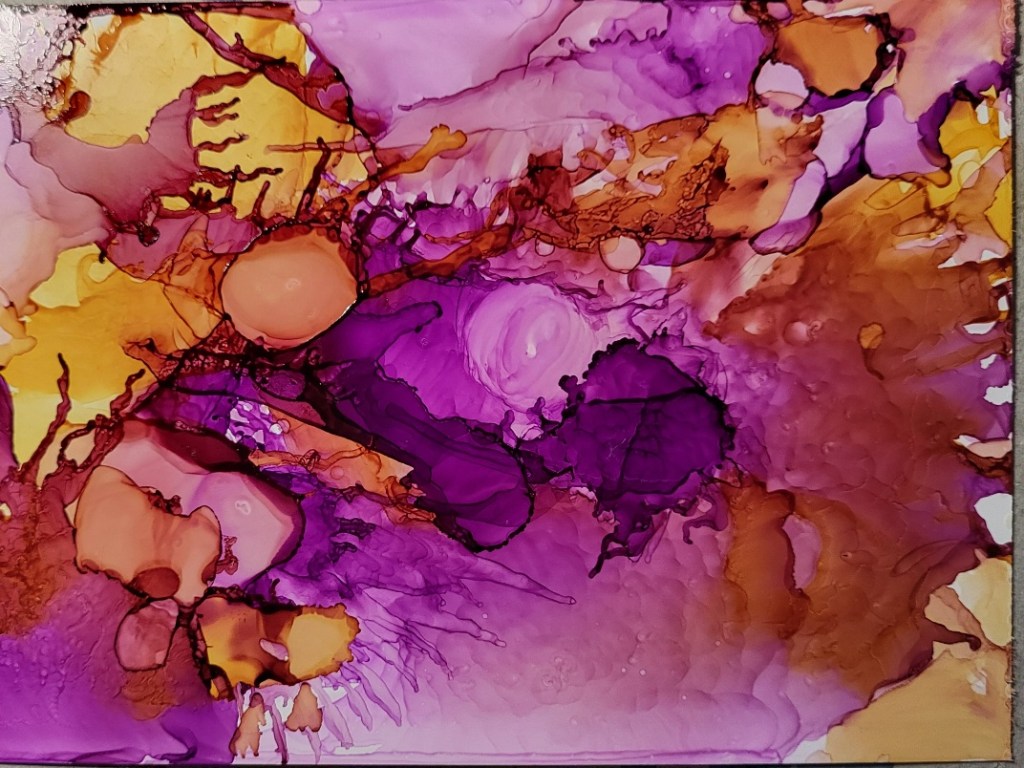
I was inspired by an artist on our local ‘Open Studio’ circuit last year who creates wonderful work using acrylic paint and alcohol ink and as there are plenty of tutorials on YouTube, thought I’d have a go.
You just need a couple of inks to start with, some smooth non-porous paper, some 95% isopropyl alcohol, a straw or hair dryer and off you go. Drop some alcohol onto the paper add some ink on top and push it around with the straw or hairdryer. I used the little puffer I have for cleaning dust off my lenses.
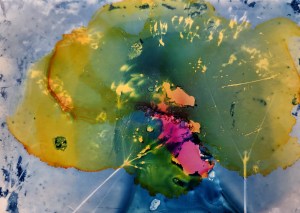
One of the reasons I wanted to try this process out though was because I had also seen someone on Instagram, I can’t remember who now, put cyanotype on top of alcohol ink with some interesting effects. It sounds simple enough, but the type of paper needed for cyanotype is absorbent and for alcohol ink, non-absorbent so how to get round that? I couldn’t find anything on YouTube about making cyanotype on yupo paper or layered with alcohol ink but there are several tutorials showing how to make cyanotypes on glass using gelatine mixed with the cyanotype chemicals. I had also done some experiments with gum bichromate where I needed to size the watercolour paper before use with PVA size so that the gum adhered to the paper so that was another options. In the event I tried both so save time, covering one half of the paper with a cyanotype/pva size mix and the other with cyanotype/gelatine mix, let it dry and went through the normal process for exposing cyanotype.
The PVA/cyanotype mix didn’t work at all as the mix just ran straight off the paper. I had more, albeit limited, success with the gelatine mix in so far as I got an image but still lots of lessons to be learnt.
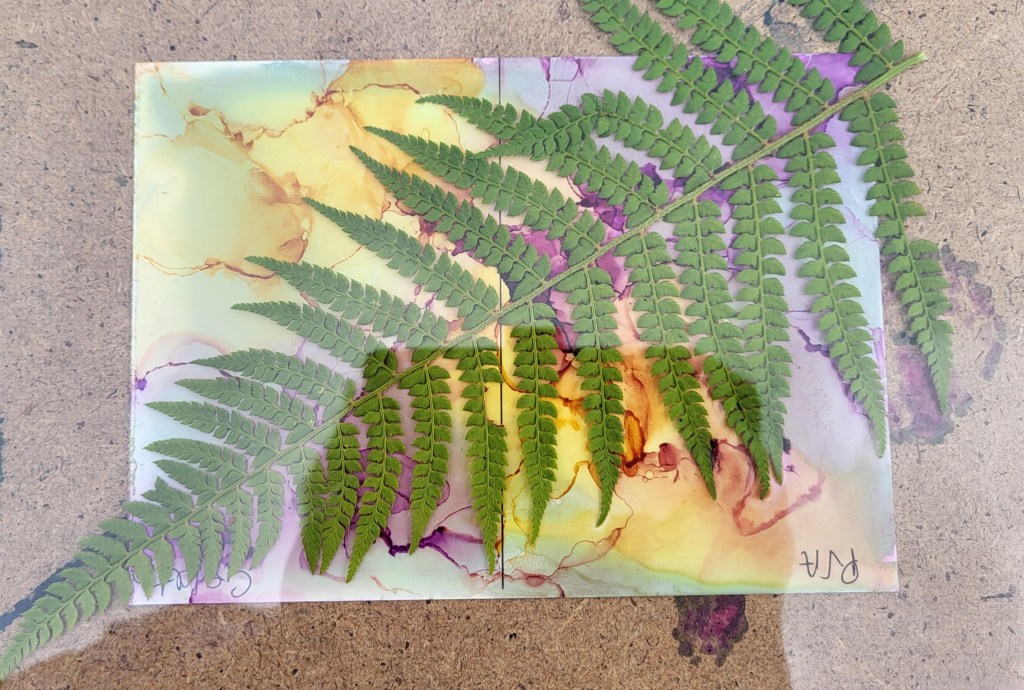
Although I had followed the guidance on one of the tutorials about the proportions of cyanotype to gelatine, the gelatine was not diluted enough and the mix was too thick. As can be seen from the image above, I used this as a test print for exposure and did get an image but the ink design dominates and drowns out the fern, so the main learning point from this is that I need to which is the more important, cyanotype or ink and it is definitely cyanotype.
My second attempt faired better, though there are lessons to be learnt there too.
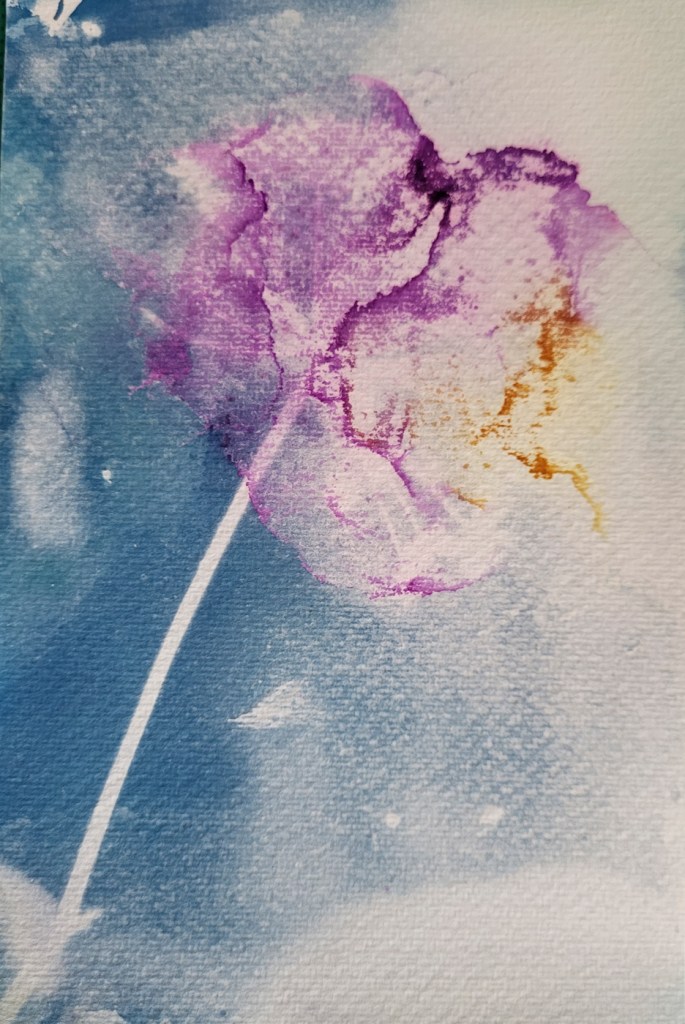
One of the methods of sizing watercolour paper for gum bichromate is to use a well diluted gelatine mix and I had some already prepared for the next gum bichromate session. This was enough for me to add a little ink where I wanted it to be, let it dry and coat with cyanotype chemicals. This time I used a dried head of cow parsley and exposed under a UV lamp, no test strip this time. What I had hoped was that the ink would appear in the white areas blocking the lamp and the rest would take on the normal cobalt blue of the cyanotype but it didn’t.
The size has prevented the paper absorbing the cyanotype chemicals, the print is under-exposed so I’m not getting the outline of the seedhead coming through, have I over washed the print? Maybe.
I do quite like the painterly effect though so all is not lost so where to next? The ink has got to be the accent rather than dominate, so maybe I just size a small area where I will apply the ink. I will try again with gelatine but in a more diluted form and I will definitely use watercolour paper which is much cheaper than Yupo.